
 Did you ever had trouble with Network Manager and felt that you need to try to setup DHCP or static IP address from command Line in Linux? I once accidentally removed Gnome (my bad, wasn’t paying attention and did an apt-get autoremove -y .. how bad is that.. ) So I was stuck, I couldn’t connect to Internet to reinstall my Gnome Network Manager because I’m in TEXT mode network-manager was broken. I learned a good lesson. you need internet for almost anything these days unless you’ve memorized all those manual command.
This guide will guide you on how to setup DHCP or static IP address from command Line in Linux. It saved me when I was in trouble, hopefully you will find it useful as well. In case you’ve only got Wireless, you can use this guide to connect to WiFi network from command line in Linux.
Note that my network interface is eth0 for this whole guide. Change eth0 to match your network interface.
Static assignment of IP addresses is typically used to eliminate the network traffic associated with DHCP/DNS and to lock an element in the address space to provide a consistent IP target.
Step 1 : STOP and START Networking service
Some people would argue restart would work, but I prefer STOP-START to do a complete rehash. Also if it’s not working already, why bother?
# /etc/init.d/networking stop
 [ ok ] Deconfiguring network interfaces...done.
 # /etc/init.d/networking start
 [ ok ] Configuring network interfaces...done.
Step 2 : STOP and START Network-Manager
If you have some other network manager (i.e. wicd, then start stop that one).
# /etc/init.d/network-manager stop
 [ ok ] Stopping network connection manager: NetworkManager.
 # /etc/init.d/network-manager start
 [ ok ] Starting network connection manager: NetworkManager.
Just for the kicks, following is what restart would do:
 # /etc/init.d/network-manager restart
 [ ok ] Stopping network connection manager: NetworkManager.
 [ ok ] Starting network connection manager: NetworkManager.
Step 3 : Bring up network Interface
Now that we’ve restarted both networking and network-manager services, we can bring our interface eth0 up. For some it will already be up and useless at this point. But we are going to fix that in next few steps.
# ifconfig eth0 up
(or)
# ifup eth0
The next command shows the status of the interface. as you can see, it doesn’t have any IP address assigned to it now.
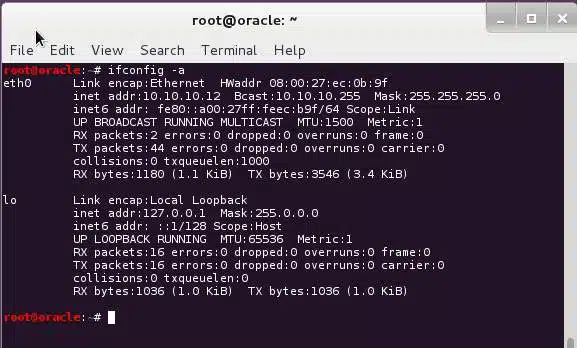
 # ifconfig eth0
 eth0      Link encap:Ethernet  HWaddr aa:bb:cc:11:22:33
 UP BROADCAST MULTICAST  MTU:1500  Metric:1
 RX packets:0 errors:0 dropped:0 overruns:0 frame:0
 TX packets:0 errors:0 dropped:0 overruns:0 carrier:0
 collisions:0 txqueuelen:1000
 RX bytes:0 (0.0 B)  TX bytes:0 (0.0 B)
Step 4 : Setting up IP address – DHCP or Static?
Now we have two options. We can setup DHCP or static IP address from command Line in Linux. If you decide to use DHCP address, ensure your Router is capable to serving DHCP. If you think DHCP was the problem all along, then go for static.
Again, if you’re using static IP address, you might want to investigate what range is supported in the network you are connecting to. (i.e. some networks uses 10.0.0.0/8, some uses 172.16.0.0/8 etc. ranges). For some readers, this might be trial and error method, but it always works.
Step 4.1 – Setup DHCP from command Line in Linux
Assuming that you’ve already completed step 1,2 and 3, you can just use this simple command
The first command updates /etc/network/interfaces file with eth0 interface to use DHCP.
# echo “iface eth0 inet dhcp” >>/etc/network/interfaces
The next command brings up the interface.
# ifconfig eth0 up
(or)
# ifup eth0
With DHCP, you get IP address, subnet mask, broadcast address, Gateway IP and DNS ip addresses. Go to step xxx to test your internet connection.
Step 4.2 – Setup static IP, subnet mask, broadcast address in Linux
Use the following command to setup IP, subnet mask, broadcast address in Linux. Note that I’ve highlighted the IP addresses in red. You will be able to find these details from another device connected to the network or directly from the router or gateways status page. (i.e. some networks uses 10.0.0.0/8, some uses 172.16.0.0/8 etc. ranges)
 # ifconfig eth0 192.168.43.226
 # ifconfig eth0 netmask 255.255.255.0
 # ifconfig eth0 broadcast 192.168.43.255
Next command shows the IP address and details that we’ve set manually.
# ifconfig eth0
 eth0     Link encap:Ethernet  HWaddr aa:bb:cc:11:22:33
 inet addr:192.168.43.226  Bcast:192.168.43.255  Mask:255.255.255.0
 UP BROADCAST RUNNING MULTICAST  MTU:1500  Metric:1
 RX packets:19325 errors:0 dropped:0 overruns:0 frame:0
 TX packets:19641 errors:0 dropped:0 overruns:0 carrier:0
 collisions:0 txqueuelen:1000
 RX bytes:0 (0.0 B)  TX bytes:0 (0.0 B)
Because we are doing everything manually, we also need to setup the Gateway address for the interface. Use the following command to add default Gateway route to eth0.
# route add default gw 192.168.43.1 eth0
We can confirm it using the following command:
# route -n
 Kernel IP routing table
 Destination     Gateway         Genmask         Flags Metric Ref    Use Iface
 0.0.0.0         192.168.43.1    0.0.0.0         UG    0      0        0 eth0
 192.168.43.0    0.0.0.0         255.255.255.0   U     0      0        0 eth0
Step 4.3 – Alternative way of setting Static IP in a DHCP network
If you’re connected to a network where you have DHCP enabled but want to assign a static IP to your interface, you can use the following command to assign Static IP in a DHCP network, netmask and Gateway.
# echo -e “iface eth0 inet dhcp\n address 10.1.1.2\n netmask 255.255.255.0\n gateway 10.1.1.1″>>/etc/network/interfaces
At this point if your network interface is not up already, you can bring it up.
# ifconfig eth0 up
(or)
# ifup eth0
Step 4.4 – Fix missing default Gateway
Looks good to me so far. We’re almost there.
Try to ping http://google.com/ (cause if www.google.com is down, Internet is broken!):
# ping google.com
 PING google.com (119.30.40.16) 56(84) bytes of data.
 64 bytes from cache.google.com (119.30.40.16): icmp_req=1 ttl=49 time=520 ms
 64 bytes from cache.google.com (119.30.40.16): icmp_req=2 ttl=49 time=318 ms
 64 bytes from cache.google.com (119.30.40.16): icmp_req=3 ttl=49 time=358 ms
 64 bytes from cache.google.com (119.30.40.16): icmp_req=4 ttl=49 time=315 ms
 ^C
 --- google.com ping statistics ---
 4 packets transmitted, 4 received, 0% packet loss, time 3002ms
 rtt min/avg/max/mdev = 315.863/378.359/520.263/83.643 ms
It worked!
Step 5 : Setting up nameserver / DNS
For most users step 4.4 would be the last step. But in case you get a DNS error you want to assign DNS servers manually, then use the following command:
# echo “nameserver 8.8.8.8\n nameserver 8.8.4.4″ >>/etc/resolv.conf
This will add Google Public DNS servers to your resolv.conf file. Now you should be able to ping or browse to any website.
Conclusion
Losing internet connection these days is just painful because we are so dependent on Internet to find usable information. It gets frustrating when you suddenly lose your GUI and/or your Network Manager and all you got is either an Ethernet port or Wireless card to connect to the internet. But then again you need to memorize all these steps.
I’ve tried to made this guide as much generic I can, but if you have a suggestion or if I’ve made a mistake, feel free to comment. Thanks for reading. Please share & RT.
25 comments
Just wanted to say, your guides are amazing and should be included into kali’s desktop help manual. Thanks for your awesome work!
Hi Matt,
That’s very kind, thank you. I’m happy that my little contributions are helping others. Cheers,
-BMO
I’ve gone through the steps listed in Step 4.2 and when I check my settings are correct, until I reboot.
After I reboot all my settings have reverted back to the original settings.
Any ideas?
The only problem with this is that nowadays Linux machines aren’t always shipped with the tools you use. They are now shipped with the systemd virus so the whole init.d doens’t work anymore and ifconfig isn’t shipped on a large number of distro’s.
Hi,
The intention was to show what to do when things are broken badly. In my case, I’ve lost Network Manager and all of Gnome Desktop. I agree this is very old school but I’m sure it’s better than reinstalling.
Not sure what distro you’re talking about. I use Debian based Kali (and Debian Wheezy), CentOS(5,6,7) and Ubuntu for work, personal and testing. ifconfig is present is every one of them. ifconfig also exists in all variants of server distro, even in all Big-IP F5’s or CheckPoint Firewalls.
Hope that explains my inspiration for this article. Cheers,
-BMO
Hi ,
I want to say Thank you for your Guide, it’s very useful.
and want to add another method for Step 5 : Setting up nameserver / DNS:
add nameserver directly to resolv.conf file
nano /etc/resolv.conf
Dynamic resolv.conf(5) file for glibc resolver(3) generated by resolvconf(8)
DO NOT EDIT THIS FILE BY HAND — YOUR CHANGES WILL BE OVERWRITTEN
nameserver 8.8.8.8
nameserver 8.8.4.4
search Home
nano or vi is not requiered, use “printf” instead “echo”… e.g:
printf “nameserver 8.8.8.8\nnameserver 8.8.4.4\n” >> /etc/resolv.conf
double-check with:
grep nameserver /etc/resolv.conf
Hey I’m new to VM my eth0 inet addr is 10.0.02.15 but every video I watch their inet addr always starts with 192. I was wondering what I can do to change my inet addr to start with 192. Is this guide a solution
Hi Billy Bob,
Is 10.x address coming from VBox internal or from your router? You possibly selected Bridged network. Try juggling between Bridged and NAT. Also look up VBox IP addressing in Google. Cheers
-BMO
Please help, I’ve done all these steps and still I don’t have internet connection with bridged adapter. When I set NAT I have internet connection but with bridged adapter i don’t. I checked with ifconfig eth0 command and I have ip, netmask and broadcast ip. What could be the problem?
Excellent guide. I haven’t been using any debian based linux distros in a while and forgot where the entries go manually.
I was actually kind of surprised how long it took to find your page in google, there is a lot of pages that don’t actually answer the question, but yours was spot on.
I did all the commands but my IP address doesn’t show up, and now my internet server on Linux iceweasel is down.
It’s telling me that “Server not found” I really need help.
Hi Blackmoreops
Thanks for the tutorial. I do have a question tho, in kalisana, I have followed your advice step by step to configure a static ip on my kali VM. But when I check with ifconfig, I still get the ip assigned by my modem? I run the kali vm on fedora 22 host… Is there a way around this? Regards Adexx
Hey Blackmoreops, Thanks for the great article. Being a total NOOB, I’m wondering if these are the last steps in getting my correct lab setting to enumerate De-Ice 1.100 with nmap. My current setting on Kali 2016 machine are: add:192.168.1.5 , mask: 255.255.255.0, default gw 192.168.1.1. Both machine set to NAT in Virtualbox 5. I’ve tried numerous scans ie., ping, list proctocol verify, and stealth and I’m unable to find any open ports. Help!!!!!!!
Best Regards.
C
i tried on my kali linux but i lost my internet connection
too me
:(
hello everyone i have got problem on my kali linux with internet. Kali is connected to my wifi but iceweasel can’t open any site. Can you help me solve this problem please ?
check mtu and DNS
Followed through all the steps, and it worked. Then I restarted the router, and everything is back to the earlier configuration?
thanks for tutorial.bu how change the ip that blocked by google :D
Hello
sorry but wasnt able to configure my network. I installed kali into my hdd and im using it as my main OS on this pc(idk if thats recommended or not) . I am curently connected to the internet with an ethernet cable and somehow in th top-right corner it says that is curently connected but when i try to open ice weasel i get a message that tells me “server not found” can someone please tell me how to fix this issue and also i followed your tutorial until the end but i had trouble in the end because i get this message bash: /etc/resolv.conf: no such file or directory . If you can help me i would be so gratefull. Sorry for butchering the english language and its grammar
Sir,
How can we change or spoof dns server in kali Linux.
Sir,
I can’t get my static IP address to ping google.
This is what I am trying to do:
ping google.com using a server created with static IP address using Linux Redhat VM Ware,
please help!
MC
For setting up DHCP using the Command :
ifconfig eth0 inet dhcp
Also works
For setting up DHCP using command :
ifconfig eth0 inet dhcp
Also works