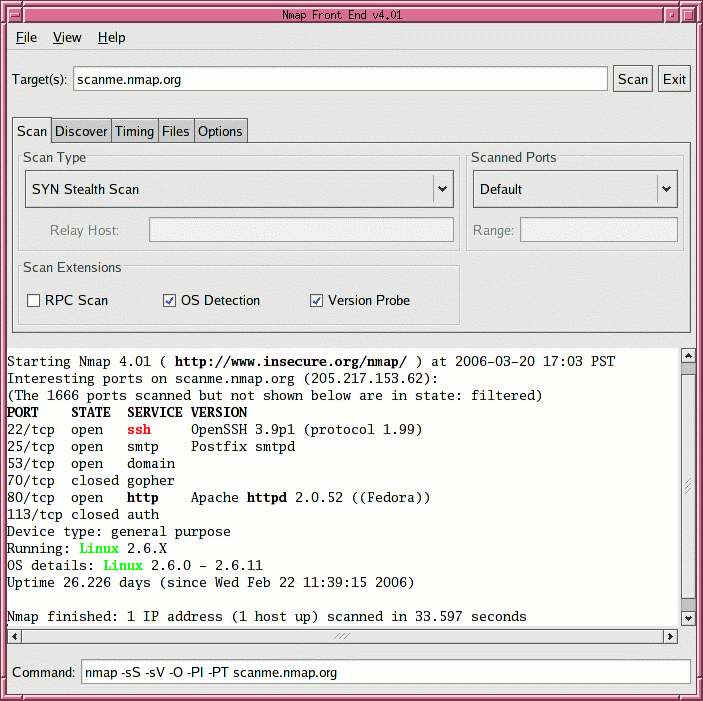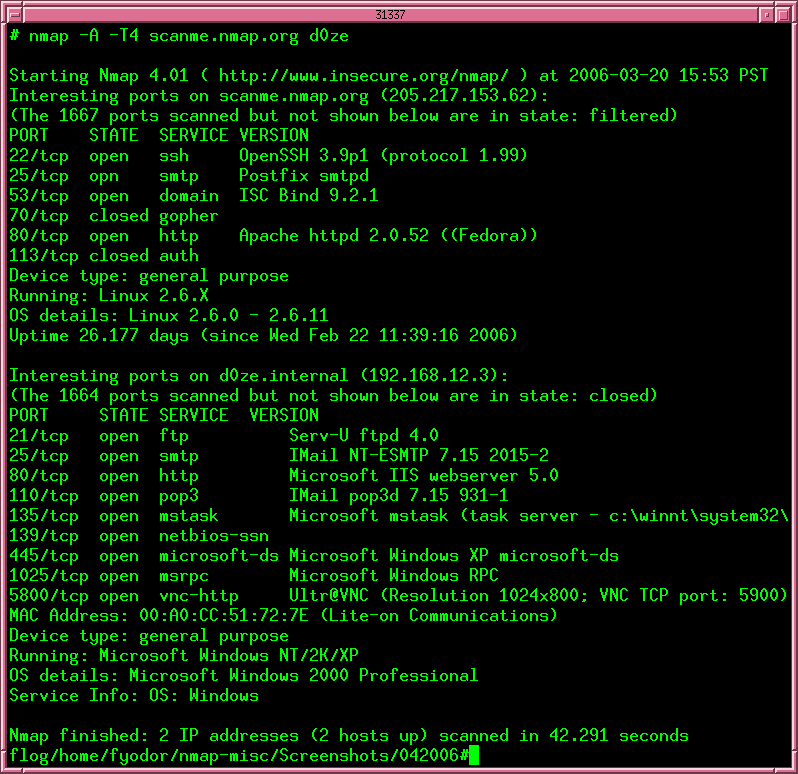
Nmap (Network Mapper) is an essential open-source security tool for network exploration, security scanning, and auditing. For hackers, penetration testers, and security professionals, Nmap serves as a crucial reconnaissance tool to identify vulnerabilities and map out network infrastructures. The powerful utility comes with numerous options that might seem overwhelming for beginners, but mastering these commands can significantly enhance your security assessment capabilities. This comprehensive guide will walk you through the Top 35 Nmap Commands for Hackers and security professionals. Whether you’re conducting security audits, penetration testing, or learning about network security, these commands will help you discover network vulnerabilities and strengthen your defensive posture.
Table of Contents
What is Nmap and What is it Used For?
Nmap (“Network Mapper”) is a versatile open-source tool designed for network exploration and security auditing. Created by Gordon Lyon, it efficiently scans large networks and individual hosts using innovative IP packet techniques.
Nmap helps answer crucial security questions such as:
- Which computers are currently running on the local network?
- What IP addresses are active in your network environment?
- What operating systems are running on target machines?
- Which ports are open on scanned machines?
- Are there any malware or virus infections on the systems?
- Are there unauthorised servers or network services present?
- Which systems don’t meet the organisation’s minimum security requirements?
Note: Port scanning may be illegal in some jurisdictions. Always ensure you have proper authorisation before scanning any network or system. This guide is intended for educational purposes and security testing only.
Nmap Commands for Hackers
1. Scan a Single Host or IP Address (IPv4)
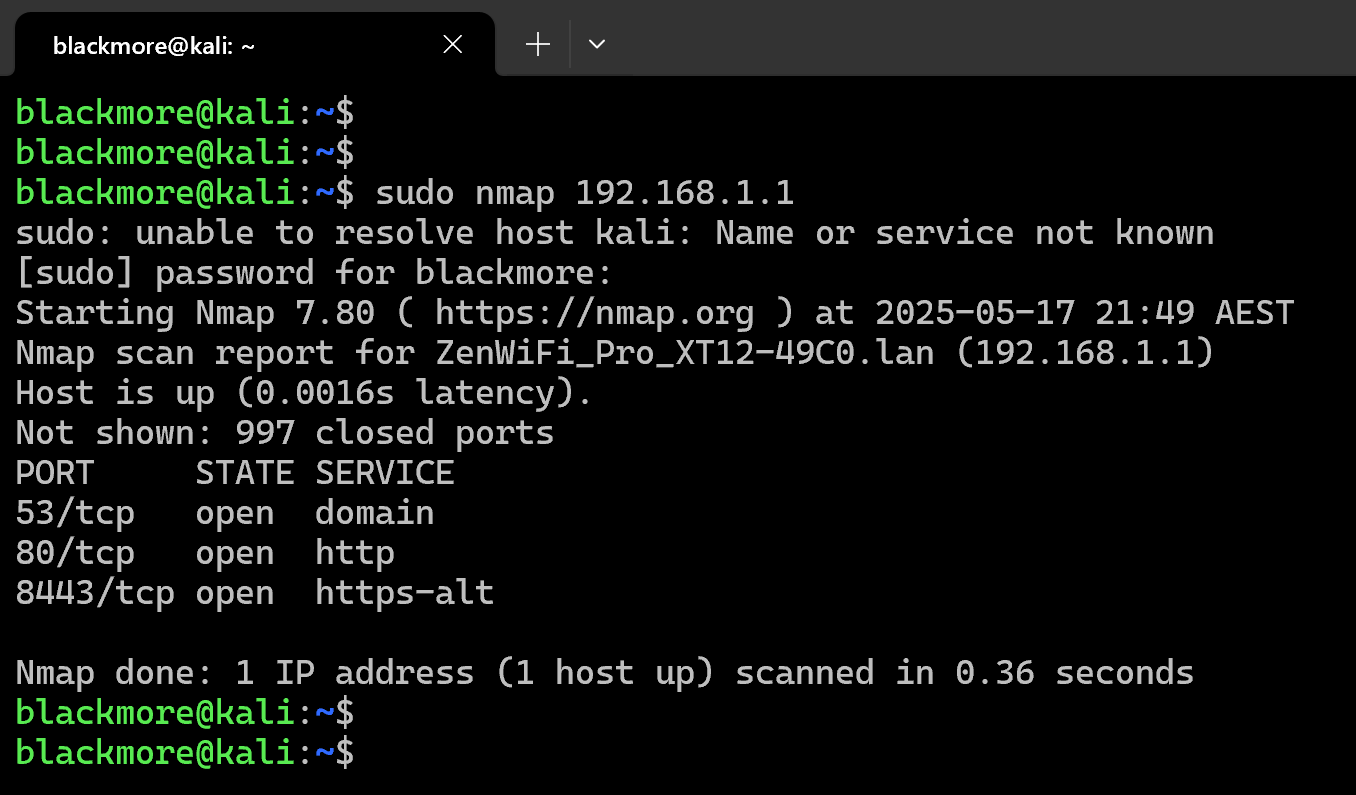
The most basic Nmap scan targets a single machine. This is your starting point for reconnaissance and should be used when you need to quickly identify open ports on a specific target. The verbose (-v) option provides additional details about the scan progress and results, which is useful for troubleshooting or when you need more comprehensive information about the target.
Use this command at the beginning of your security assessment to establish a baseline understanding of the target’s network footprint. It’s particularly valuable during the initial phase of penetration testing when you’re mapping out the attack surface.
# Scan a single IP address
nmap 192.168.1.1

# Scan a hostname
nmap server1.example.com

# Scan with more detailed information
nmap -v server1.example.com
2. Scan Multiple IP Addresses or Subnets (IPv4)
Scan multiple targets simultaneously to efficiently map larger network segments. This approach is essential when performing security audits across an entire network infrastructure or when you need to assess multiple systems within the same environment.
These commands save significant time compared to running individual scans and provide a more comprehensive view of the network landscape. They’re particularly useful during network assessments when you need to identify all potential entry points or when hunting for vulnerable systems across a corporate network. The subnet scan (using CIDR notation) is especially valuable for thorough network mapping.
# Scan multiple specific IP addresses
nmap 192.168.1.1 192.168.1.2 192.168.1.3

# Alternative syntax for same subnet
nmap 192.168.1.1,2,3

# Scan an IP range
nmap 192.168.1.1-20

# Use wildcard to scan a range
nmap 192.168.1.*

# Scan an entire subnet
nmap 192.168.1.0/24
3. Read List of Hosts/Networks from a File
For scanning numerous targets, use a text file to organize your scan targets. This approach is invaluable when conducting large-scale security assessments across complex networks with many systems or when you need to systematically scan the same targets repeatedly.
This method helps maintain consistency in your scanning workflow and prevents errors that might occur when manually typing multiple IP addresses. It’s especially useful for scheduled scans, compliance audits, or when you need to document which systems were assessed. You can easily update the target list file as your scope changes without modifying your scan commands.
# Create a list file
cat > /tmp/targets.txt
server1.example.com
192.168.1.0/24
192.168.1.1/24
10.1.2.3
localhost
[Ctrl+D to save]

# Scan all targets in the file
nmap -iL /tmp/targets.txt
4. Exclude Hosts/Networks from Scans
When scanning large networks, you may need to exclude specific hosts to avoid disrupting critical systems, triggering security alerts, or respecting scope limitations in penetration tests. This is especially important when scanning production environments where certain systems might be sensitive to scanning (like medical devices, industrial control systems, or critical infrastructure).
The exclude options help you maintain precise control over your scan targets and reduce the risk of accidental service disruption. This approach is also useful when certain hosts have security measures that might flag your scanning activities, potentially locking you out or alerting security teams prematurely during authorized testing.
# Exclude a single host
nmap 192.168.1.0/24 --exclude 192.168.1.5

# Exclude multiple hosts
nmap 192.168.1.0/24 --exclude 192.168.1.5,192.168.1.254

# Exclude hosts listed in a file
nmap -iL /tmp/scanlist.txt --excludefile /tmp/exclude.txt
5. Enable OS and Version Detection, Script Scanning
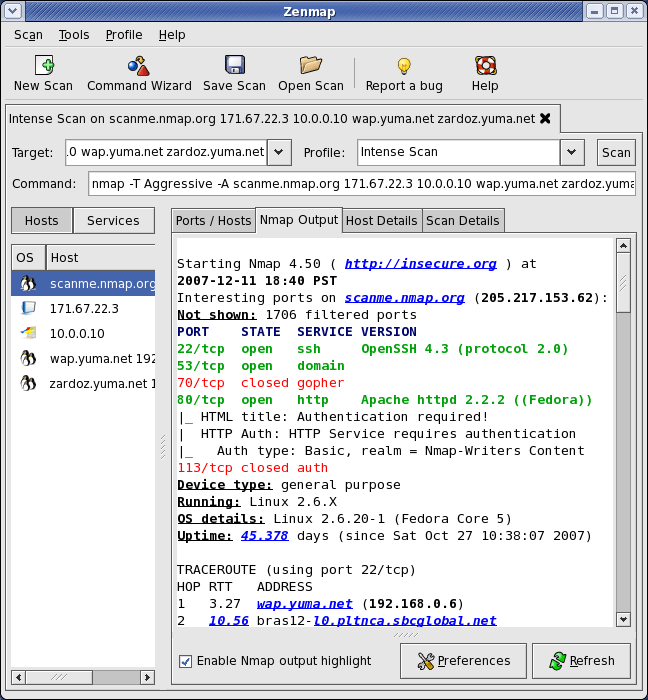
The -A flag enables aggressive scanning mode, which includes OS detection, version scanning, script scanning, and traceroute. This provides comprehensive intelligence about your targets in a single command, making it one of the most valuable options for thorough reconnaissance.
Use this when you need detailed information about the target environment, including operating systems, exact service versions, and potential vulnerabilities. This scan type is particularly useful during the information gathering phase of penetration testing or security assessments when you need to build a complete profile of the target. Be aware that this scan is more intrusive and easily detectable due to its comprehensive nature.
# Comprehensive scan with OS detection
nmap -A 192.168.1.254

# Verbose comprehensive scan
nmap -v -A 192.168.1.1

# Scan multiple targets with OS detection
nmap -A -iL /tmp/scanlist.txt
6. Detect Firewall Protection
The -sA (ACK scan) flag helps determine if a host is protected by a firewall or packet filtering. Unlike regular port scans, this doesn’t determine if ports are open or closed, but rather if they’re filtered or unfiltered. This provides valuable information about network protection mechanisms.
Use this scan when you need to map firewall rules or identify which hosts in a network have enhanced security measures. It’s particularly useful during the reconnaissance phase to understand the target’s defensive posture and to help plan subsequent, more targeted scans. This scan is relatively stealthy compared to full connection scans, as it doesn’t complete the TCP handshake.
# Check for firewall
nmap -sA 192.168.1.254

# Check hostname for firewall
nmap -sA server1.example.com
7. Scan Protected by Firewall Hosts
The -PN (No Ping) option skips the host discovery stage and treats all specified hosts as online. This is extremely useful when targeting systems behind firewalls or those configured not to respond to ping requests, which is a common security practice in hardened environments.
Without this option, Nmap might incorrectly determine that hosts are offline if they don’t respond to ping probes. Use this when you suspect targets are configured to ignore ICMP ping requests or when dealing with strict firewall rules that block standard discovery methods. This is often necessary when scanning external networks or highly secured environments where standard host discovery fails.
# No ping scan (assumes target is up)
nmap -PN 192.168.1.1

# No ping scan on hostname
nmap -PN server1.example.com
8. Scan IPv6 Hosts/Addresses
The -6 option enables IPv6 scanning capabilities in Nmap. As organizations increasingly adopt IPv6, the ability to scan these networks becomes essential for complete security assessments. Without explicitly using this flag, Nmap defaults to IPv4 scanning only.
Use these commands when auditing dual-stack environments or networks that have fully transitioned to IPv6. This scan type is crucial for ensuring you don’t miss potential attack vectors on IPv6-enabled systems, which might be overlooked during standard IPv4-only scans. Many security professionals forget to check IPv6, which can leave significant blind spots in security assessments.
# Scan IPv6 address
nmap -6 IPv6-Address-Here

# Scan IPv6 hostname
nmap -6 server1.example.com

# Scan specific IPv6 address
nmap -6 2607:f0d0:1002:51::4

# Comprehensive IPv6 scan
nmap -v A -6 2607:f0d0:1002:51::4
9. Network Discovery (Host Detection)
The -sP flag performs a ping scan that discovers hosts on a network without doing a port scan. This is often the first step in network reconnaissance and is designed to quickly identify active hosts without generating excessive traffic or triggering security alerts from port scanning.
Use this when you need to quietly map out which systems are online in a target network segment. It’s significantly faster than full port scans and much less intrusive, making it perfect for initial reconnaissance or when scanning large networks where you first need to identify which systems are worth further investigation. This scan also reveals MAC addresses of local devices, which can help identify device types based on manufacturer.
# Ping scan to find live hosts
nmap -sP 192.168.1.0/24
10. Fast Network Scan
The -F (Fast) option instructs Nmap to scan fewer ports than the default scan, focusing only on the most common 100 ports. This dramatically reduces scan time while still identifying the most likely services that could present security vulnerabilities.
Use this approach when time is limited or when scanning numerous hosts where thoroughness can be traded for speed. It’s particularly valuable during initial reconnaissance of large networks, incident response scenarios where quick results are needed, or when scanning might otherwise trigger security alerts if prolonged. Remember that while faster, this scan may miss less common but potentially vulnerable services.
# Fast scan IPv4
nmap -F 192.168.1.1

# Fast scan IPv6
nmap -6 -F IPv6_Address_Here
11. Display Scan Reason Details
The –reason flag provides additional information about why Nmap classified ports in specific states (open, closed, or filtered). This extra detail helps you understand the underlying network responses that Nmap used to make its determinations, giving you deeper insight into the target’s network behavior.
This option is particularly valuable when troubleshooting scan results or when you need to understand why certain ports appear as they do. It helps differentiate between ports that are genuinely closed versus those blocked by firewalls, providing crucial context for security assessments. The added information often reveals subtle details about firewall configurations and network security postures.
# Show reason for port states
nmap --reason 192.168.1.1

# Verbose reason for hostname scan
nmap --reason server1.example.com
12. Show Only Open Ports
The –open option configures Nmap to show only open (or possibly open) ports in the scan results, filtering out closed and filtered ports. This simplifies output analysis by focusing only on accessible services that represent potential attack vectors or entry points.
Use this flag when you’re specifically looking for exploitable services or when dealing with noisy networks where many filtered ports might clutter your results. It’s particularly useful during penetration testing or vulnerability assessments when you need to quickly identify which services are available for further testing. This option significantly improves readability of scan results on hosts with extensive port filtering.
# Show only open ports
nmap --open 192.168.1.1

# Open ports on hostname
nmap --open server1.example.com
13. Display All Packets Sent and Received
The –packet-trace option provides detailed information about every packet sent and received during the scan. This gives you visibility into the actual network communication occurring between Nmap and the target systems, including timing, protocol details, and responses.
This level of detail is invaluable when debugging scan issues, understanding network behavior, or learning how Nmap interacts with different systems. Security professionals use this option to analyze exactly how targets respond to different probe types, which can reveal subtle details about firewalls, IDS systems, and other security controls. It’s also an excellent educational tool for understanding the TCP/IP protocols and network security principles.
# Show all packet details
nmap --packet-trace 192.168.1.1

# Packet tracing for hostname
nmap --packet-trace server1.example.com
14. Show Host Interfaces and Routes
The –iflist flag instructs Nmap to display information about the network interfaces and routing tables on your system. This doesn’t scan any remote targets but instead provides details about your own system’s network configuration, which is helpful for understanding how your scans will be routed.
Use this option when troubleshooting connectivity issues or when planning complex scans across multiple networks. It’s particularly useful in multi-homed environments (systems with multiple network interfaces) to ensure you’re scanning from the correct interface. This command also helps identify potential network configuration issues that might affect scan accuracy or performance.
# Show all network interfaces and routes
nmap --iflist
15. Scan Specific Ports
The -p option allows you to target specific ports or port ranges rather than the default port selection. This provides precise control over which services you examine, allowing for more focused and efficient scans. You can specify individual ports, ranges, or combinations of TCP and UDP ports.
This targeted approach is essential when investigating specific services, following up on intelligence about particular vulnerabilities, or when you need to minimize scan footprint. For example, scanning only web ports (80, 443) when assessing web applications, or checking for specific backdoor ports during incident response. Custom port specifications also help reduce scan time and network traffic compared to full port scans.
# Scan a single port
nmap -p 80 192.168.1.1

# Scan TCP port 80
nmap -p T:80 192.168.1.1

# Scan UDP port 53
nmap -p U:53 192.168.1.1

# Scan multiple ports
nmap -p 80,443 192.168.1.1

# Scan port ranges
nmap -p 80-200 192.168.1.1

# Combined port options
nmap -p U:53,111,137,T:21-25,80,139,8080 192.168.1.1

# Scan all ports (wildcard)
nmap -p "*" 192.168.1.1

# Scan most common ports
nmap --top-ports 10 192.168.1.1
16. Fast Network Sweep
The -T5 timing template configures Nmap for extremely aggressive scanning, maximizing speed at the potential cost of accuracy. This is the fastest scanning mode available and is designed for situations where speed is more critical than stealth or thoroughness.
Use this aggressive timing when scanning networks with reliable, high-bandwidth connections where packet loss is unlikely. It’s ideal for quick enumeration of large internal networks during authorized security assessments or when time constraints are severe. However, be cautious when using this on production networks or unstable connections, as it might cause service disruptions or miss hosts due to the high packet rate overwhelming network equipment.
# Rapid scan of subnet
nmap -T5 192.168.1.0/24
17. Operating System Detection
The -O flag enables Nmap’s OS detection capabilities, which analyze various network responses to identify the operating system running on target hosts. This powerful feature helps build a more complete profile of the target environment and can reveal outdated or vulnerable systems.
OS fingerprinting is crucial for tailoring exploitation strategies during penetration testing or for identifying non-compliant systems during security audits. The –osscan-guess option makes Nmap more aggressive in its OS detection, providing best-guess results even with limited information. This capability is particularly valuable when planning targeted attacks based on OS-specific vulnerabilities or when documenting the technology landscape of a network.
# Basic OS detection
nmap -O 192.168.1.1

# OS detection with guessing
nmap -O --osscan-guess 192.168.1.1

# Verbose OS detection
nmap -v -O --osscan-guess 192.168.1.1
18. Service Version Detection
The -sV option instructs Nmap to determine the exact versions of services running on open ports. This goes beyond simply identifying that a port is open—it attempts to establish which application and version is actually running, revealing critical information about potentially vulnerable software.
Version detection is essential for accurate vulnerability assessments, as many exploits target specific versions of services. This intelligence lets you identify outdated software that might have known vulnerabilities, allowing for precise targeting during penetration tests or prioritization during remediation efforts. When used with vulnerability databases, this information can quickly highlight exploitable systems in your network.
# Detect service versions
nmap -sV 192.168.1.1

# Verbose service detection
nmap -v -sV 192.168.1.1
19. TCP ACK and TCP Syn Ping Scan
The -PS (TCP SYN Ping) and -PA (TCP ACK Ping) options provide alternative host discovery methods that can bypass simple firewall rules. Traditional ICMP pings are often blocked in secured environments, but many firewalls allow certain TCP packets, making these techniques valuable for discovering hosts in protected networks.
Use these options when standard ping scans fail to detect live hosts. The SYN ping sends a SYN packet as if initiating a connection, while the ACK ping sends an ACK packet that might bypass stateless firewalls. Specifying ports with these options lets you target commonly open services, increasing the chance of receiving responses from filtered networks. These techniques are essential for thorough reconnaissance in environments with basic firewall protection.
# TCP SYN ping scan
nmap -PS 192.168.1.1

# Multiple port SYN ping
nmap -PS 80,21,443 192.168.1.1

# TCP ACK ping scan
nmap -PA 192.168.1.1

# Multiple port ACK ping
nmap -PA 80,21,200-512 192.168.1.1
20. IP Protocol Ping Scan
The -PO option performs host discovery by sending IP protocol ping packets to determine if a host is online. Unlike traditional ICMP or TCP/UDP pings, this method checks for responses to various IP protocols beyond the common ones, potentially bypassing security measures that filter standard ping types.
This technique is valuable when other ping methods are blocked or filtered. It works by sending packets for different IP protocols (like ICMP, IGMP, IP-in-IP) and watching for responses, even error responses that indicate the host is alive. This method can reveal hosts that are configured to ignore standard pings but still process other IP protocols, making it a useful addition to your reconnaissance toolkit for hardened environments.
# IP protocol ping
sudo nmap -PO 192.168.1.1
21. UDP Ping Scan
The -PU option conducts host discovery using UDP ping packets instead of the more common TCP or ICMP methods. This technique is particularly effective against hosts that filter TCP and ICMP traffic but still run UDP services like DNS (53), SNMP (161), or DHCP (67/68).
UDP ping scans are valuable when targeting networks with tight firewall rules that block traditional discovery methods. Even if a UDP port is closed, many systems will respond with an ICMP “port unreachable” message, revealing their presence. This method is especially useful in environments where security is focused on TCP filtering while neglecting UDP traffic filtering. The ability to specify target ports lets you focus on commonly-open UDP services to maximize discovery success.
# UDP ping scan
nmap -PU 192.168.1.1

# UDP ping on specific ports
nmap -PU 2000,2001 192.168.1.1
22. Advanced TCP Scan Types
Different TCP scan types allow you to adapt your reconnaissance approach based on the target environment and your stealth requirements. The SYN scan (-sS) is semi-stealthy as it doesn’t complete connections, while the connect scan (-sT) is more reliable but leaves more evidence in logs. The ACK scan (-sA) helps determine firewall rulesets, while Window (-sW) and Maimon (-sM) scans exploit specific TCP implementations to gather information.
These advanced techniques are essential for penetration testers who need to evade detection or bypass specific security controls. Each scan type generates different packet signatures that might trigger different responses from intrusion detection systems, giving you options when standard scans are detected or blocked. Understanding when to use each scan type is a mark of an experienced security professional.
# Stealthy SYN scan
nmap -sS 192.168.1.1

# Full TCP connect scan (non-stealthy)
nmap -sT 192.168.1.1

# TCP ACK scan
nmap -sA 192.168.1.1

# TCP Window scan
nmap -sW 192.168.1.1

# TCP Maimon scan
nmap -sM 192.168.1.1
23. UDP Service Scan
The UDP service scan (-sU) identifies open UDP ports, which are often overlooked during security assessments. Many critical services run on UDP, including DNS (53), SNMP (161/162), and NTP (123), making this scan type essential for comprehensive security audits. UDP scans complement TCP scans to provide a complete picture of the target’s attack surface.
UDP scans are typically slower than TCP scans as many systems rate-limit ICMP responses, but they often reveal services that might be completely missed in TCP-only assessments. Combining UDP scans with service version detection (-sV) helps identify potentially vulnerable UDP services that could provide entry points into otherwise well-secured systems. Many security professionals neglect UDP scanning, creating blind spots in their assessments.
# UDP scan
nmap -sU 192.168.1.1

# UDP scan on hostname
nmap -sU server1.example.com
24. IP Protocol Scan
The IP protocol scan (-sO) identifies which IP protocols (TCP, UDP, ICMP, IGMP, etc.) are supported by the target system. This scan type helps map the target’s network stack capabilities and can reveal unusual configurations or services. By understanding which IP protocols are in use, you gain insight into the target’s networking implementation and potential attack vectors.
This specialized scan helps identify systems running non-standard services or protocols that might indicate unusual server roles or security appliances. It can reveal network devices with custom protocol implementations or identify systems running protocols like GRE (47), ESP (50), or OSPF (89) that might indicate VPN endpoints or routing infrastructure. This scan provides a different perspective on the target’s network functionality beyond standard port scanning.
# Scan for supported IP protocols
nmap -sO 192.168.1.1
25. Firewall Evasion Techniques
These specialized scan types are designed to bypass certain firewall implementations by using non-standard TCP flag combinations. The Null scan (-sN) sends packets with no flags set, the FIN scan (-sF) sends only the FIN flag, and the Xmas scan (-sX) sends packets with FIN, PSH, and URG flags set—creating a “lit up like a Christmas tree” packet. These techniques exploit how different systems implement the TCP RFC specifications.
These scans can reveal subtle differences in how targets handle unusual TCP packets, potentially identifying the firewall or OS type. They’re particularly useful against stateless firewalls or packet filters that only block SYN packets. While modern firewalls and IDS systems often detect these scan types, they remain valuable tools for testing firewall rule consistency and identifying misconfigured security controls that might allow such unusual packets through.
# TCP Null Scan (no flags set)
nmap -sN 192.168.1.254

# TCP FIN Scan (FIN flag only)
nmap -sF 192.168.1.254

# TCP Xmas Scan (FIN, PSH, URG flags)
nmap -sX 192.168.1.254
26. Fragment Packets Scan
Packet fragmentation (-f) splits TCP headers across multiple IP packets, potentially bypassing packet inspection devices that don’t reassemble fragments before filtering. This technique can evade certain intrusion detection systems, packet filters, and firewalls that only examine the first fragment or don’t properly reassemble packets before making filtering decisions.
The MTU option allows you to specify custom fragment sizes, giving you fine-grained control over packet fragmentation patterns. This can be particularly effective against older or misconfigured security devices. However, modern security solutions typically reassemble fragments before inspection, so this technique works best against legacy systems or improperly configured security controls. This approach tests the target’s ability to handle fragmented packets properly.
# Fragment packets
nmap -f 192.168.1.1

# Fragment with hostname
nmap -f server1.example.com

# Specify fragment offset
nmap -f 15 server1.example.com

# Custom MTU size
nmap --mtu 32 192.168.1.1
27. Cloak Scan with Decoys
The decoy (-D) option allows you to obscure the origin of your scan by generating additional scan traffic that appears to come from other IP addresses. This makes it difficult for the target to determine your actual IP address among the decoys. The target’s logs will show scan attempts from multiple sources, making your real IP address harder to identify and potentially complicating incident response.
This technique is particularly useful during penetration tests when you want to avoid immediate detection or attribution. By specifying multiple decoy IPs (including your own), you create “noise” that helps hide your actual scanning activities. For maximum effectiveness, use decoy IPs that are actually online but won’t be affected by potential counterattacks or abuse responses from the target.
# Use decoy IPs
nmap -n -Ddecoy-ip1,decoy-ip2,your-own-ip,decoy-ip3,decoy-ip4 remote-host-ip

# Example with actual IPs
nmap -n -D192.168.1.5,10.5.1.2,172.1.2.4,3.4.2.1 192.168.1.5
28. MAC Address Spoofing
MAC address spoofing (–spoof-mac) changes the source MAC address of your scan packets, helping to evade MAC address filtering or to impersonate authorized devices on the network. This technique can bypass network access controls that rely on MAC filtering, such as those commonly found in wireless networks, hotel networks, or corporate environments with MAC-based authentication.
The option to use random MAC addresses (–spoof-mac 0) is particularly useful for testing MAC filtering effectiveness across an entire network segment. MAC spoofing works best on the local network segment, as MAC addresses aren’t forwarded beyond the local broadcast domain. This technique complements IP-based evasion methods, providing an additional layer of anonymity for your scanning activities on local networks.
# Spoof MAC address
nmap --spoof-mac MAC-ADDRESS-HERE 192.168.1.1

# Combined with other options
nmap -v -sT -PN --spoof-mac MAC-ADDRESS-HERE 192.168.1.1

# Random MAC address
nmap -v -sT -PN --spoof-mac 0 192.168.1.1
29. Save Scan Output to File
Documenting scan results is essential for security assessments, penetration tests, and compliance audits. Nmap provides multiple output formats to save scan results for later analysis, reporting, or comparison. The standard output (-oN) format is human-readable, making it ideal for manual review and documentation. Additional formats include XML, grepable, and script output options.
Saving scan results allows you to track changes over time, compare network states before and after security controls are implemented, and maintain evidence for audit purposes. It also enables integration with other security tools through parsed output formats. Maintaining a library of past scans helps establish network baselines and identify unexpected changes that might indicate security incidents.
# Basic output redirection
nmap 192.168.1.1 > output.txt

# Normal format output
nmap -oN /path/to/filename 192.168.1.1

# Simple output to current directory
nmap -oN output.txt 192.168.1.1
30. Web Server Scanning with Nikto Integration
Chaining Nmap with web vulnerability scanners like Nikto provides comprehensive web application assessment capabilities. This integration efficiently identifies potential HTTP and HTTPS services with Nmap, then automatically passes those targets to Nikto for dedicated web vulnerability scanning. This approach combines network-level reconnaissance with application-level security testing.
Using pipes to connect these tools creates an efficient workflow that first identifies web servers across the network, then performs detailed vulnerability assessments on each discovered instance. This technique is particularly valuable for security teams conducting thorough web application security assessments across large network ranges, helping to quickly identify and prioritize vulnerable web services for further investigation or remediation.
# Pipe nmap results to Nikto
nmap -p80 192.168.1.2/24 -oG - | /path/to/nikto.pl -h -

# Scan HTTP and HTTPS ports
nmap -p80,443 192.168.1.2/24 -oG - | /path/to/nikto.pl -h -
31. Performance Tuning
The timing template option (-T4) adjusts scan performance parameters to optimize for speed while maintaining reasonable accuracy. This template strikes a balance between the slower, stealthier default settings and the aggressive, potentially disruptive fastest setting (-T5). Combining this with verbose output (-v) and other scan types allows for efficient scanning of complex environments.
Performance tuning is essential when dealing with large networks or time-constrained security assessments. The T4 template reduces delays between probes, runs multiple probes in parallel, and adjusts timeouts to complete scans faster. This balance makes it suitable for most modern networks with reliable connectivity, allowing for comprehensive scans without triggering rate-limiting mechanisms or causing connection disruptions.
# Faster scan with timing template
nmap -v -sS -A -T4 192.168.2.5
32. Aggressive Scan with Script Scanning
The aggressive scan (-A) combined with full port scanning (-p-) provides comprehensive target profiling by enabling OS detection, version scanning, script scanning, and traceroute in a single command. This thorough approach identifies all possible services across the entire 65,535 port range, leaving no stone unturned in the security assessment process.
This scan type represents one of the most thorough reconnaissance approaches available with Nmap, making it ideal for detailed security audits or penetration tests where completeness is valued over speed or stealth. While time-consuming, it discovers services running on non-standard ports and provides detailed information about each discovered service. The verbose option (-v) helps track progress and provides insight into the ongoing scan activity.
# Aggressive scan with script scanning
nmap -A -T4 -p- 192.168.1.1

# Verbose aggressive scan
nmap -v -A -T4 -p- 192.168.1.1
33. Vulnerability Detection Using NSE Scripts
The Nmap Scripting Engine (NSE) extends Nmap’s capabilities with specialized scripts for vulnerability detection, exploitation testing, and advanced service enumeration. The –script vuln option automatically runs scripts designed to detect common vulnerabilities, providing an initial vulnerability assessment alongside your port scanning activities. Categories can be combined to create customized scanning profiles.
This capability transforms Nmap from a pure reconnaissance tool into a preliminary vulnerability scanner. The script engine examines discovered services for known vulnerabilities without attempting exploitation, providing actionable security insights. While not as comprehensive as dedicated vulnerability scanners, NSE scripts help identify obvious security issues during the initial assessment phase and can guide subsequent testing with more specialized tools.
# Run vulnerability detection scripts
nmap --script vuln 192.168.1.1

# Scan specific vulnerability category
nmap --script vuln,exploit 192.168.1.1
34. Brute Force Service Authentication
Nmap’s NSE scripts include capabilities for testing authentication security on common services. These brute force scripts attempt to identify weak credentials by trying common username and password combinations against discovered services. This helps identify systems with default, weak, or predictable authentication that could be easily compromised by attackers.
While not as feature-rich as dedicated brute force tools, these scripts provide convenient basic password testing during reconnaissance. The ability to target multiple service types simultaneously (FTP, SSH, Telnet, SMTP, HTTP) allows for efficient credential security assessment across the network. However, use caution with these scripts, as repeated login attempts could trigger account lockouts or generate security alerts in monitored environments.
# Test SSH brute force
nmap --script ssh-brute -p 22 192.168.1.1

# Test HTTP basic auth
nmap --script http-brute -p 80 192.168.1.1

# Test multiple services
nmap --script brute -p 21,22,23,25,80 192.168.1.1
35. Heartbleed SSL Vulnerability Check
The ssl-heartbleed script specifically checks for the critical Heartbleed vulnerability (CVE-2014-0160) in SSL/TLS implementations. This serious vulnerability allows attackers to read protected memory from vulnerable systems, potentially exposing encryption keys, credentials, and other sensitive data. Despite being discovered in 2014, many systems remain unpatched and vulnerable.
Combining this check with version detection (-sV) ensures accurate identification of the service versions, reducing false positives. This targeted script runs quickly and provides clear results, making it an essential check when reviewing network services that use SSL/TLS. Despite its age, Heartbleed remains a critical vulnerability to test for, as unpatched legacy systems continue to exist in many network environments.
# Check for Heartbleed vulnerability
nmap -sV --script=ssl-heartbleed 192.168.1.1

# Verbose Heartbleed check
nmap -sV --script=ssl-heartbleed -v 192.168.1.1
Conclusion
By mastering these top 35 Nmap commands for hackers will significantly enhance your network security assessment capabilities. Whether you’re conducting hacking, penetration testing, or securing your own network infrastructure, Nmap provides the essential reconnaissance tools you need to identify vulnerabilities before malicious actors do. Nmap should be used for legitimate security purposes such as:
- Finding vulnerabilities in your own systems
- Conducting authorised penetration tests
- Security auditing and compliance verification
- Educational purposes and security training
For more information, consult the official Nmap documentation or man pages:
man nmap
nmap --help
The official Nmap project home page (https://nmap.org) provides additional resources, updates, and comprehensive documentation.


