Installing VirtualBox Guest Additions on Kali Linux packages correctly is crucial for optimal virtual machine performance. Many users struggle with fullscreen display issues, shared folders, and clipboard functionality when running Kali Linux on VirtualBox. This comprehensive guide provides the definitive method for installing these essential packages in 2025.
Table of Contents
Without Virtualbox Guest Additions on Kali Linux
Before installing VirtualBox Guest Additions on Kali, users typically experience:
- Inability to run Kali Linux in fullscreen mode
- Non-functional shared clipboard between host and guest
- Disabled drag-and-drop functionality
- Poor mouse integration
- Incorrect display resolution detection
- Slow performance and system freezes
Step-by-Step Installation Process
Updating System Packages
First, update your Vbox Guest Additions on Kali Linux system completely:
sudo apt-get update
sudo apt-get upgrade -y
sudo apt-get dist-upgrade -y
This crucial step ensures kernel headers match your running kernel version. Skipping this often causes installation failures.
Installing Required Dependencies
Install the necessary kernel headers for VirtualBox Guest Additions on Kali:
sudo apt-get install linux-headers-$(uname -r) -y
The $(uname -r) command automatically detects your kernel version, ensuring correct header installation.
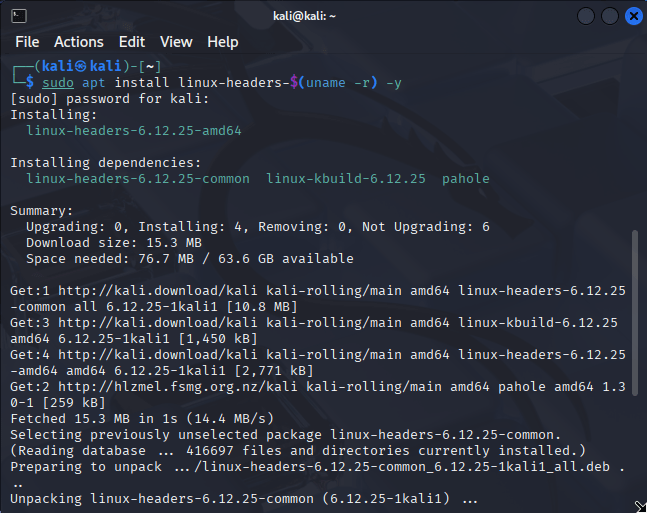
Kali Linux terminal displaying successful linux-headers installation required for VirtualBox Guest Additions Kali Linux
Mounting Guest Additions ISO
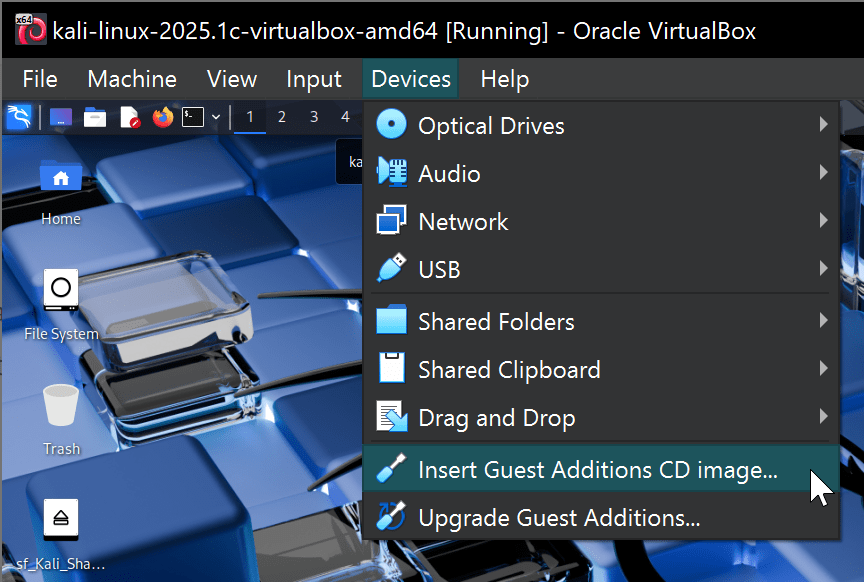
From VirtualBox’s Devices menu, select “Insert Guest Additions CD image“. This mounts the VirtualBox Guest Additions ISO containing installation files.
Copying and Installing Packages
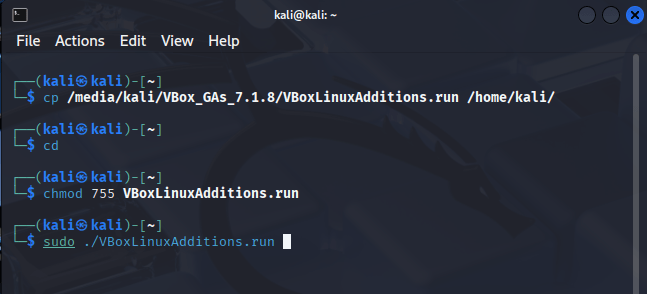
Copy the installer to your desktop:
cp /media/cdrom/VBoxLinuxAdditions.run ~/Desktop/
cd ~/Desktop/
chmod 755 VBoxLinuxAdditions.run
sudo ./VBoxLinuxAdditions.run
Watch for “…done” messages during installation. These confirm successful module compilation and installation.
Rebooting the System
After successful installation, reboot your system:
sudo reboot
Configuring Shared Folders
Setting Up Host Folders
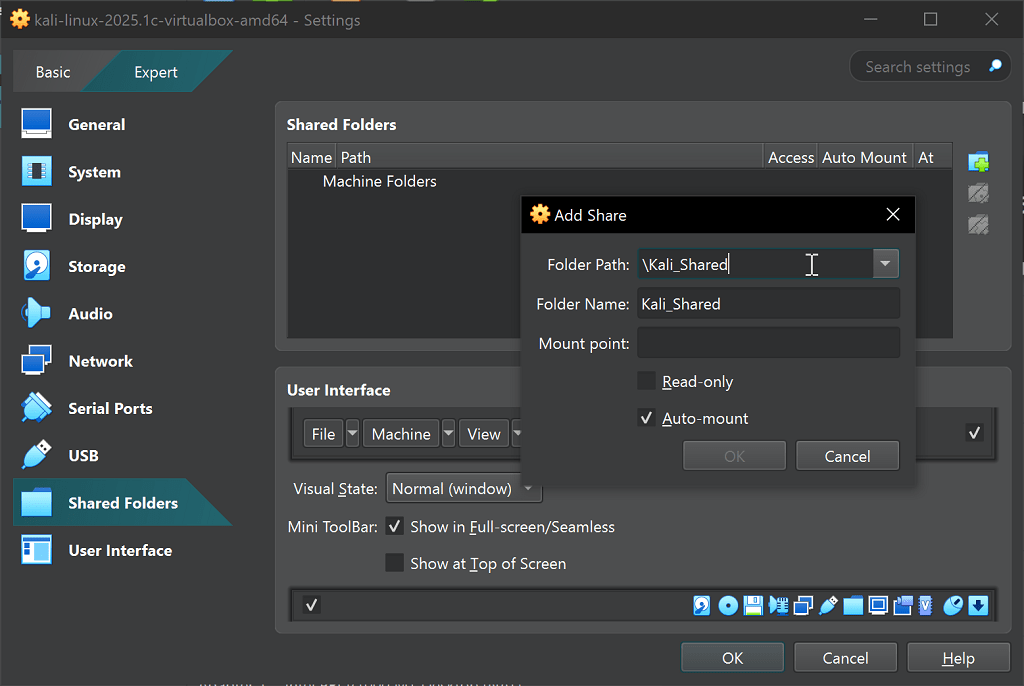
After installing VirtualBox Guest Additions, you should be able to configure shared folders through VirtualBox Manager:
- Select your Kali VM
- Click “Shared Folders” in settings
- Add your desired host folder
- Enable “Auto-mount” and “Make Permanent”
Performance Optimisation
Maximise Kali Linux performance by:
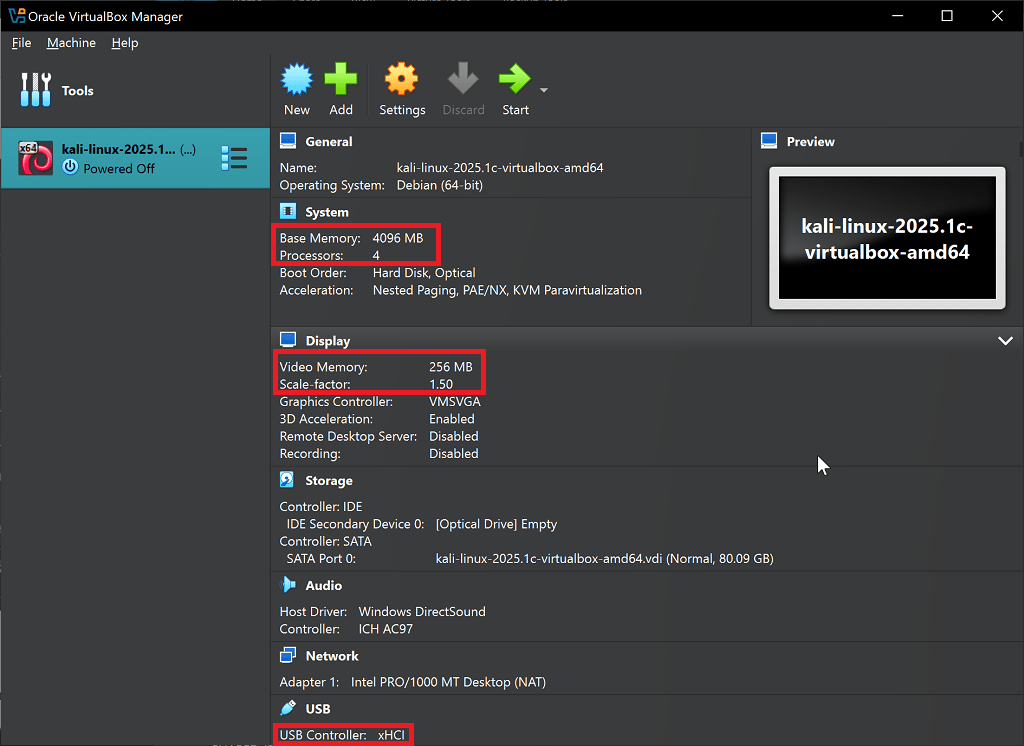
- Allocating sufficient RAM (minimum 2GB)
- Installing on SSD storage
- Adjusting video memory to 128MB or 256MB
Modern Alternatives
While VirtualBox remains popular for Kali Linux for testing securely, consider these alternatives:
- VMware Tools for better graphics performance
- QEMU/KVM for native Linux virtualisation
- WSL2 for Windows users
- Docker containers for lightweight deployments
- Hyper-V for Windows users
Conclusion
VirtualBox Guest Additions on Kali Linux provides essential integration between your host system and virtual machine and allows for better virtual machine experience. Following these steps ensures fullscreen support, clipboard sharing, and optimal performance. Regular updates and correct initial configuration prevent most common issues users encounter. With fullscreen support, shared clipboard functionality, and improved mouse integration, your penetration testing workflow becomes significantly more efficient and user-friendly.


