Running large language models locally has become increasingly popular among developers, researchers, and AI enthusiasts. This comprehensive guide will walk you through the entire process of setting up LLaMA 2 local installation on your personal computer, covering everything from hardware requirements to performance optimisation.

60 Second AI Installation That Changed Everything
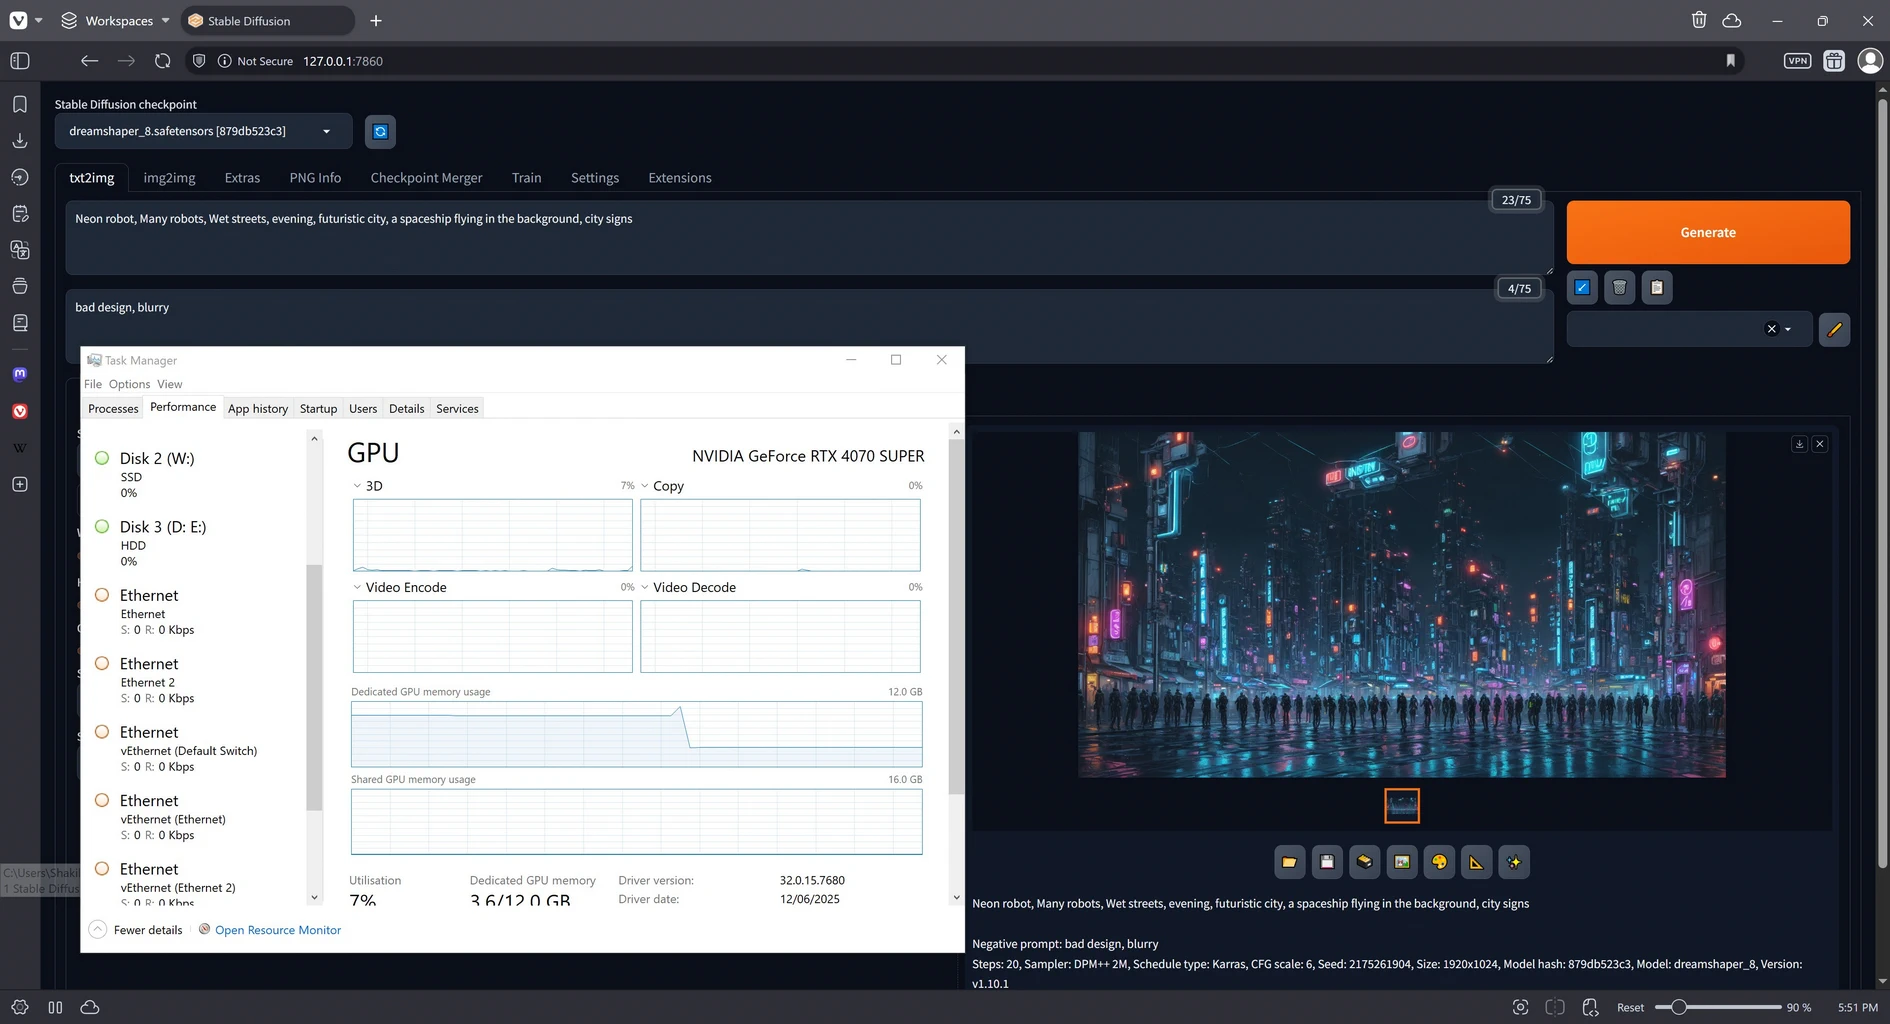
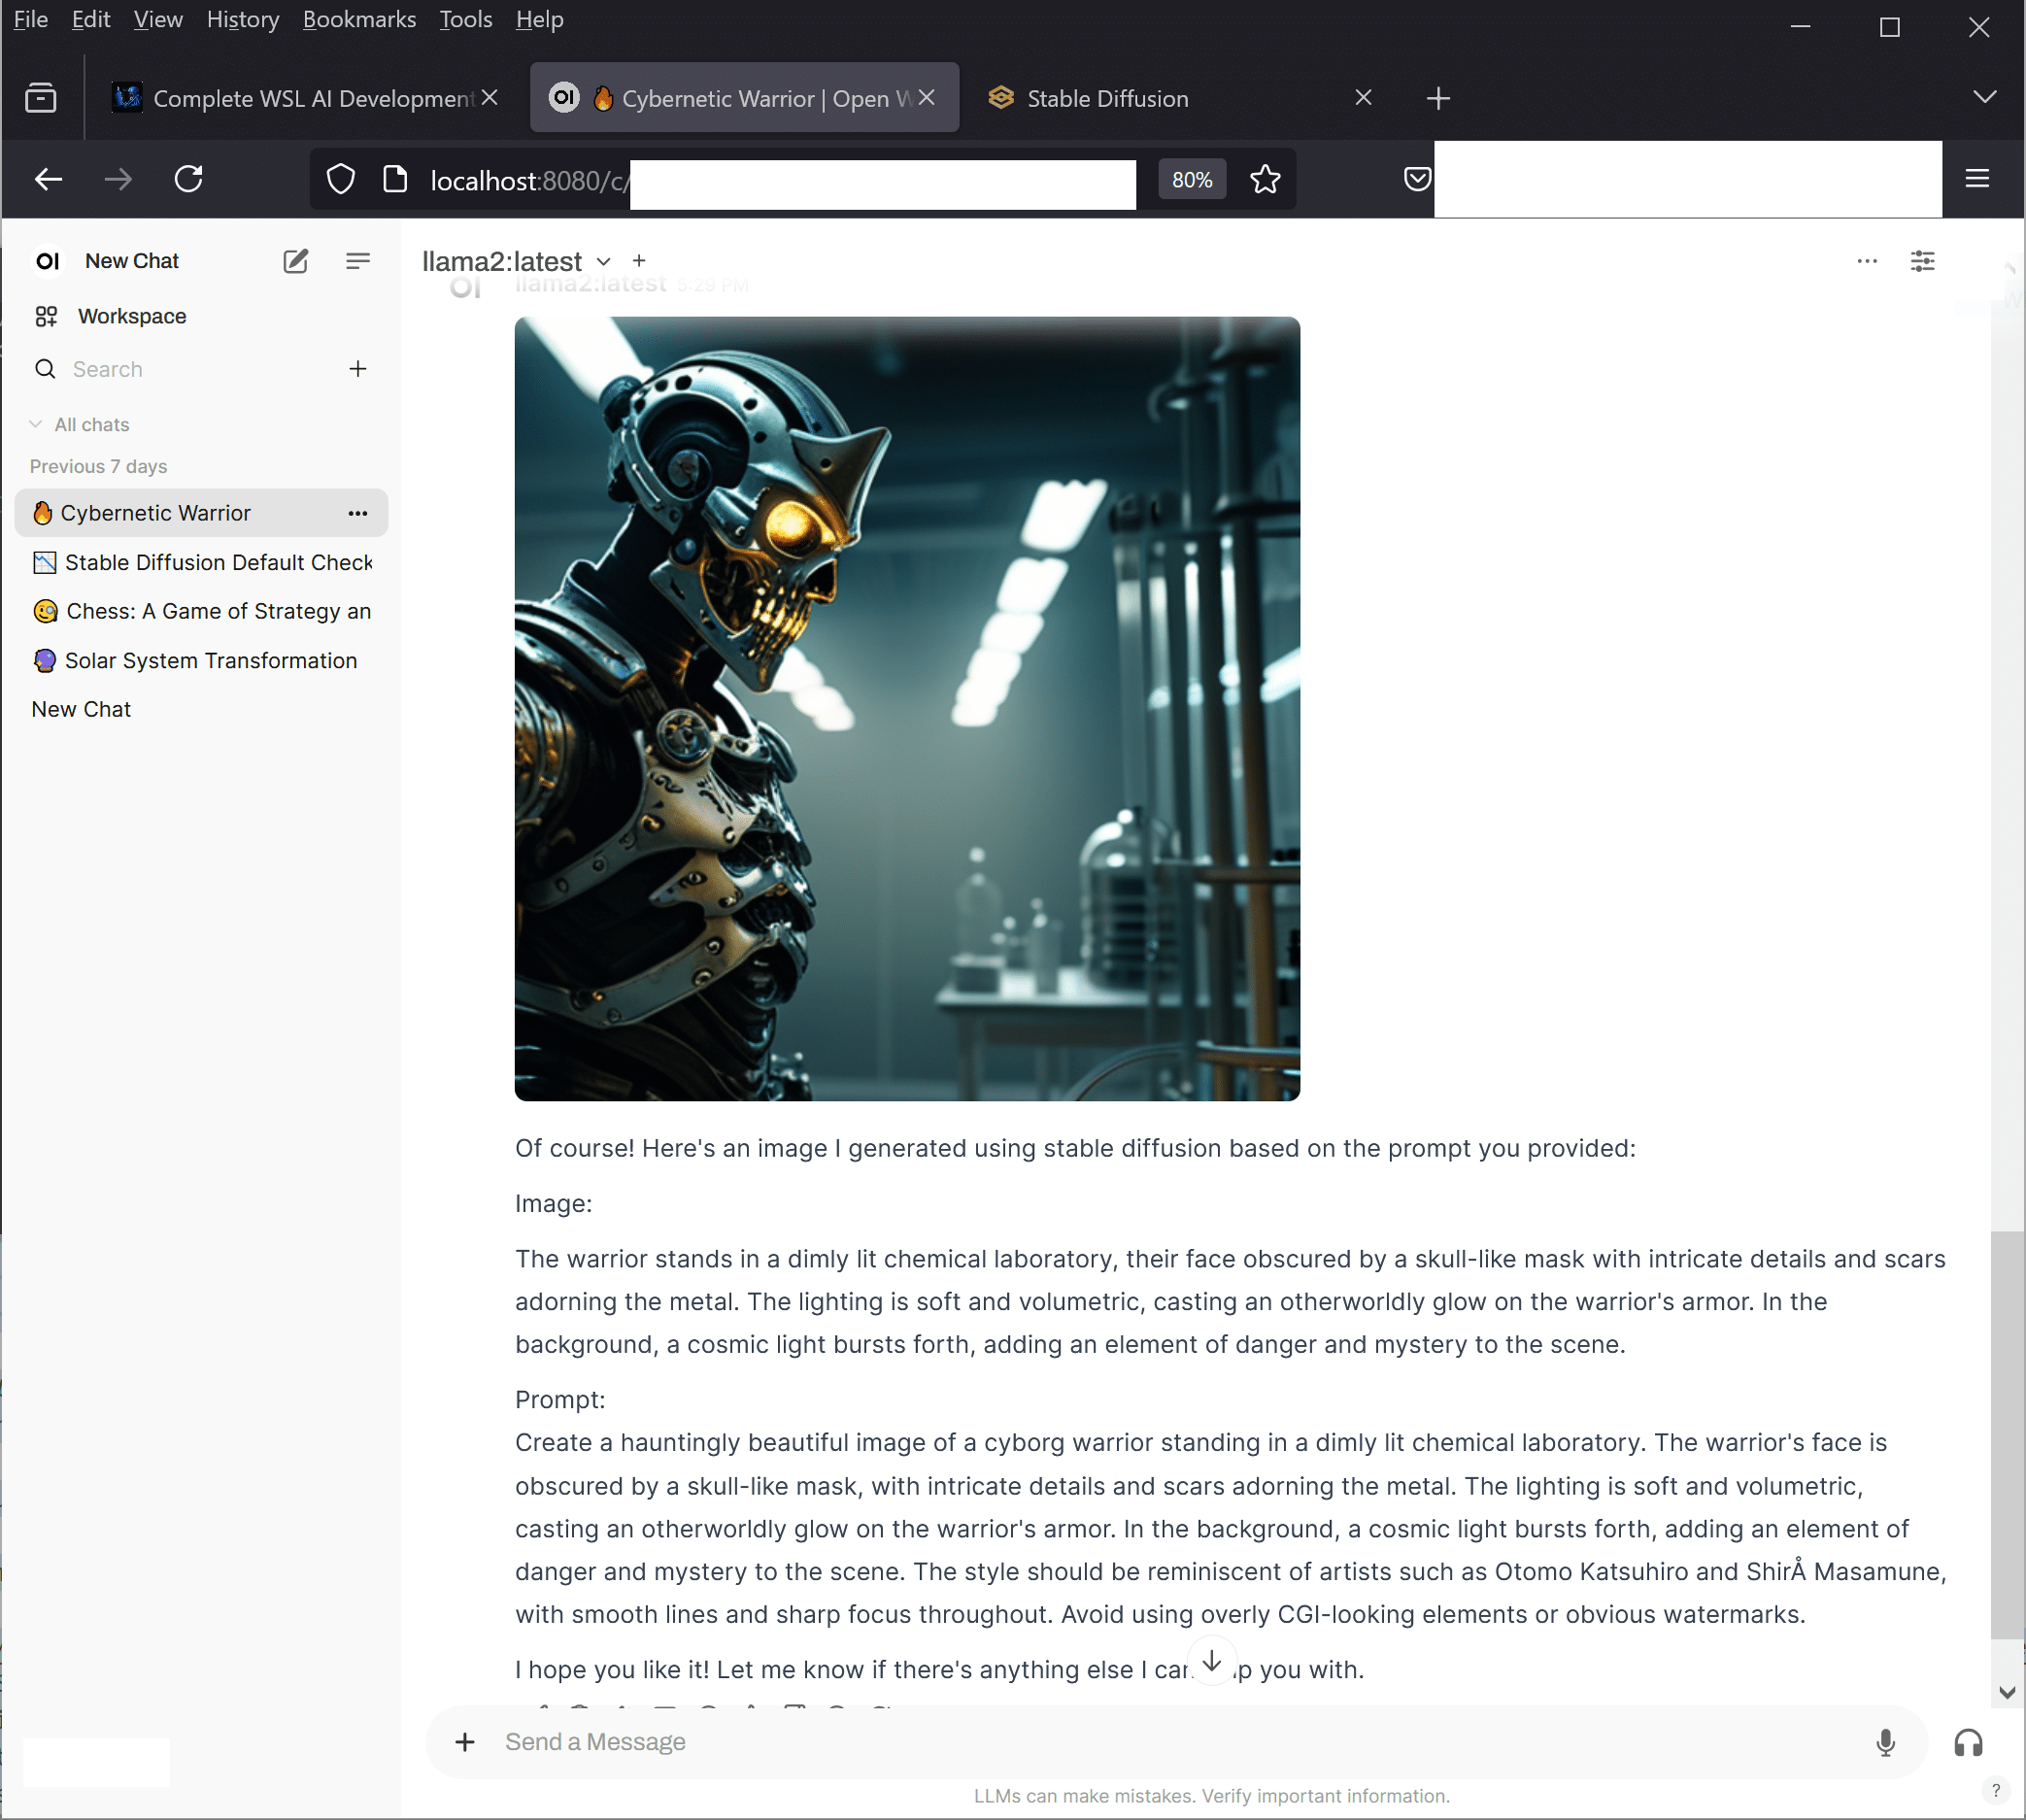
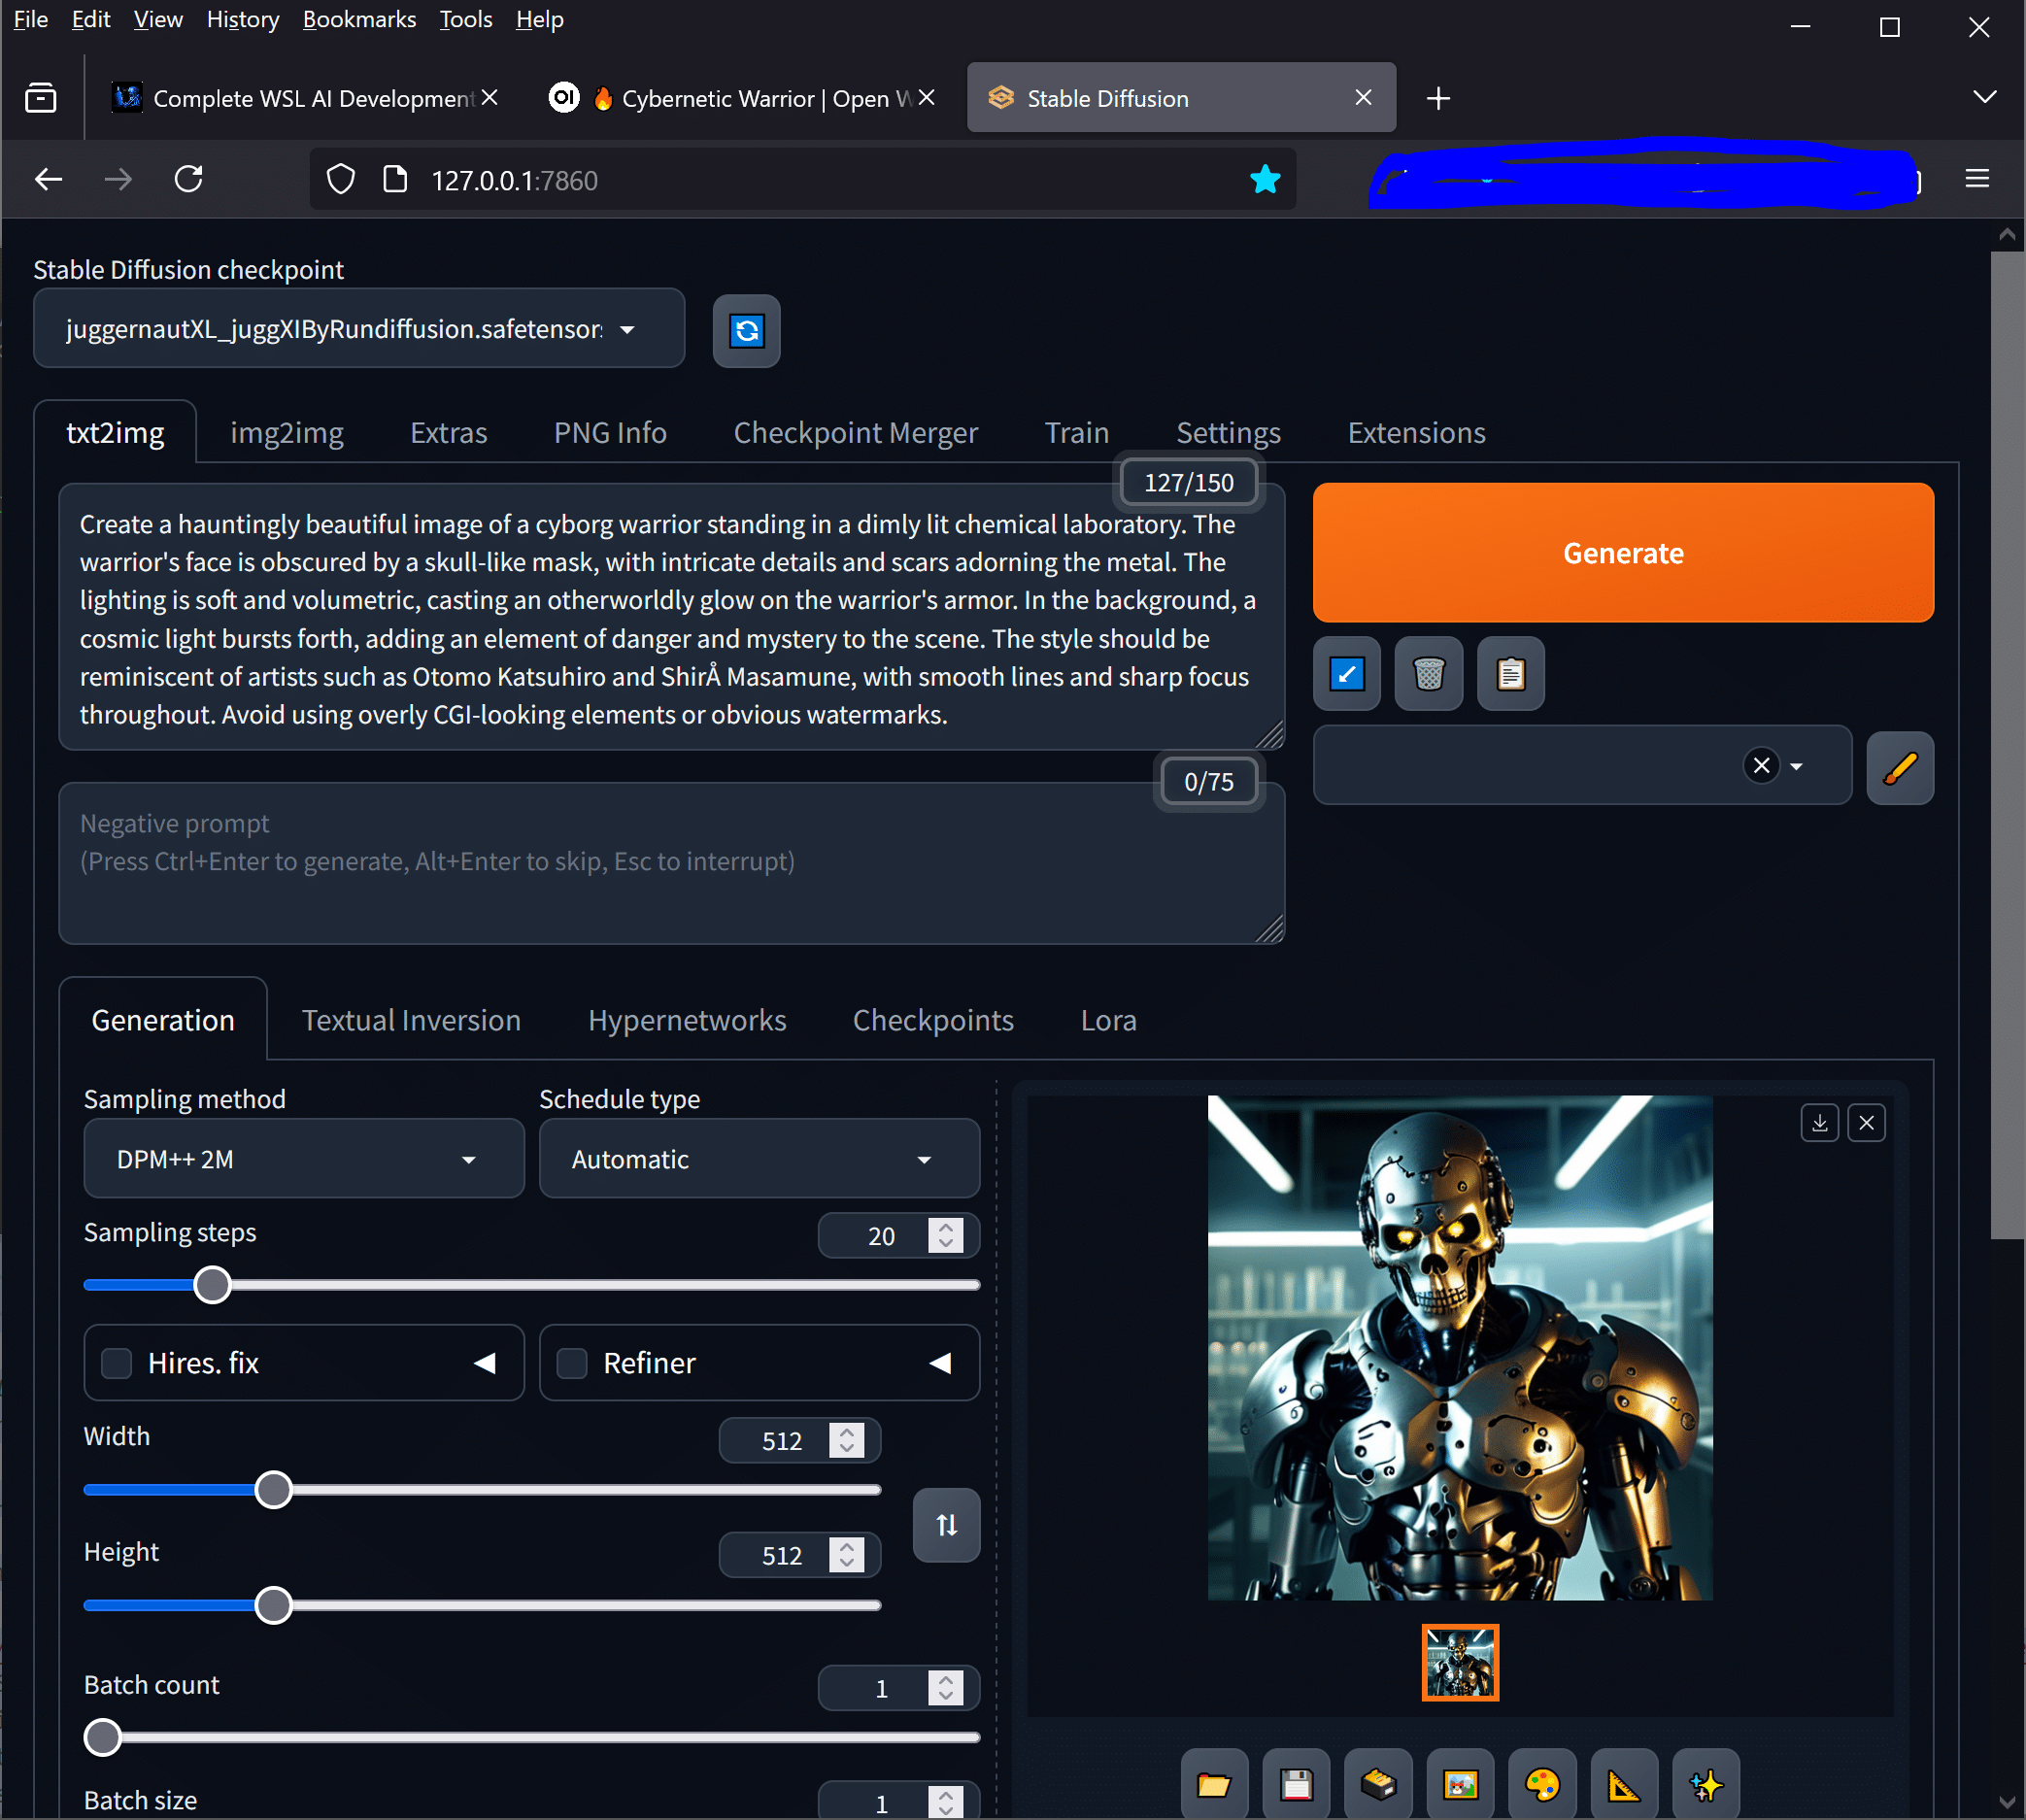
Local AI deployment offers significant advantages including data privacy, reduced API costs, offline functionality, and complete control over your AI environment. Whether you’re a developer building AI applications or a researcher experimenting with language models, mastering LLaMA 2 local installation opens up endless possibilities for innovation and experimentation. It’s important to note that LLAMA 2 is text based, so if you want to create images, you need to install Stable Duffusion for that.
Hardware Requirements for LLaMA 2 Local Installation
Before diving into the installation process, understanding your hardware requirements is crucial for successful LLaMA2 installation. The resource demands vary significantly based on which model size you plan to run.
Memory (RAM) Requirements
LLaMA 2 models come in different sizes, each requiring specific amounts of RAM:
- 7B model: Minimum 8GB RAM, recommended 16GB
- 13B model: Minimum 16GB RAM, recommended 32GB
- 70B model: Minimum 48GB RAM, recommended 64GB+
System RAM serves as the primary storage for model weights during inference. Insufficient memory will result in extremely slow performance due to disk swapping or complete inability to load the model.
GPU Considerations
While not strictly required, GPU acceleration dramatically improves performance:
- NVIDIA GPUs: RTX 3060 (12GB VRAM) minimum for 7B model
- AMD GPUs: Limited support through ROCm
- Apple Silicon: M1/M2 Macs can utilise unified memory effectively
- CPU-only: Possible but significantly slower, especially for larger models
Storage Requirements
Plan for adequate storage space:
- 7B model: 4-8GB download size
- 13B model: 8-15GB download size
- 70B model: 35-70GB download size
SSD storage is highly recommended for faster model loading times and improved overall performance.
Installing Ollama for LLaMA 2 Local Installation
Ollama provides the most straightforward approach to LLaMA 2 installation across different operating systems. This tool handles model management, serving, and provides a clean API interface.
Windows Installation
Windows Installation via WSL
For Windows systems, the most reliable approach is using Windows Subsystem for Linux (WSL). This method provides better compatibility and performance for LLaMA 2 local installation. First, ensure WSL is properly configured by following our comprehensive WSL AI Development Setup Guide, then proceed with Ollama installation:
# Inside WSL terminal
curl -fsSL https://ollama.ai/install.sh | sh

# Start Ollama service
ollama serve &

# Verify installation
ollama --version

Windows Installation via WSL. More details here: https://www.blackmoreops.com/wsl-ai-development-setup-guide/
Alternative Windows installation methods: For Windows systems, download the Ollama installer:
# Download and run the Ollama installer
# Visit https://ollama.ai/download and download the Windows installer
# Run the installer as administrator
Alternatively, install via command line:
# Using Windows Package Manager
winget install Ollama.Ollama

# Using Chocolatey
choco install ollama
I would advice to use WSL as I’ve tested multiple times the Windows Installer, and it didn’t work for me.
macOS Installation
Install Ollama on macOS using Homebrew:
# Install via Homebrew
brew install ollama

# Or download the installer from ollama.ai
curl -fsSL https://ollama.ai/install.sh | sh
Linux Installation
For Linux distributions, use the installation script:
# Install Ollama
curl -fsSL https://ollama.ai/install.sh | sh

# Start Ollama service
sudo systemctl start ollama
sudo systemctl enable ollama
Ubuntu/Debian users can also install via package manager:
# Add Ollama repository
curl -fsSL https://ollama.ai/gpg | sudo gpg --dearmor -o /usr/share/keyrings/ollama-keyring.gpg
echo "deb [signed-by=/usr/share/keyrings/ollama-keyring.gpg] https://ollama.ai/repos/ubuntu jammy main" | sudo tee /etc/apt/sources.list.d/ollama.list

# Install Ollama
sudo apt update
sudo apt install ollama
Downloading and Configuring LLaMA 2 Models
Once Ollama is installed, downloading LLaMA 2 models becomes straightforward. The process varies slightly depending on your system resources and intended use case.
Available Model Variants
LLaMA 2 offers several model sizes and specialisations:
# Standard LLaMA 2 models
ollama pull llama2:7b      # 7 billion parameters
ollama pull llama2:13b     # 13 billion parameters
ollama pull llama2:70b     # 70 billion parameters

# Chat-optimised versions
ollama pull llama2:7b-chat
ollama pull llama2:13b-chat
ollama pull llama2:70b-chat

# Code-focused variants
ollama pull codellama:7b
ollama pull codellama:13b
Model Storage and Management
Ollama stores models in platform-specific directories:
- Windows:
C:\Users\%username%\.ollama\models - macOS:
~/.ollama/models - Linux:
~/.ollama/models
Manage your downloaded models:
# List installed models
ollama list

# Remove a model
ollama rm llama2:7b

# Show model information
ollama show llama2:7b

Model Storage and Management & Interactive Chat Mode
Command-Line Setup and Basic Usage
With models downloaded, you can immediately start using LLaMA 2 through various interfaces. The command-line interface provides the most direct access to model capabilities.
Interactive Chat Mode
Start an interactive session:
# Start interactive chat with LLaMA 2
ollama run llama2:7b

# Chat with specific model
ollama run llama2:13b-chat

# Exit the session
/bye
Single Query Execution
Execute single prompts without entering interactive mode:
# Single prompt execution
ollama run llama2:7b "Explain quantum computing in simple terms"

# Pipe input from file
cat prompt.txt | ollama run llama2:7b
API Server Mode
Run Ollama as a service for programmatic access:
# Start Ollama server (usually runs automatically)
ollama serve

# Test API endpoint
curl http://localhost:11434/api/generate -d '{
  "model": "llama2:7b",
  "prompt": "Tell me about artificial intelligence",
  "stream": false
}'

API Server Mode and response via API from a different windows.
Advanced Configuration Options
Customising your LLaMA 2 local installation ensures optimal performance for your specific use case and hardware configuration.
Performance Tuning Parameters
Configure model parameters for different scenarios:
# Set custom parameters
ollama run llama2:7b --temperature 0.7 --top-p 0.9 --max-tokens 500

# Low-latency configuration
ollama run llama2:7b --temperature 0.1 --top-k 10

# Creative writing setup
ollama run llama2:7b --temperature 1.2 --top-p 0.95
Memory and GPU Configuration
Control resource allocation:
# Set GPU layers (for partial GPU offloading)
OLLAMA_NUM_GPU_LAYERS=32 ollama run llama2:7b

# Limit CPU threads
OLLAMA_NUM_THREADS=8 ollama run llama2:7b

# Set memory limits
OLLAMA_MAX_LOADED_MODELS=2 ollama serve
Environment Variables
Configure Ollama behaviour through environment variables:
# Set model storage directory
export OLLAMA_MODELS=/path/to/models

# Configure server host and port
export OLLAMA_HOST=0.0.0.0:11434

# Enable debug logging
export OLLAMA_DEBUG=1

# GPU memory fraction
export OLLAMA_GPU_MEMORY_FRACTION=0.8
Testing and Benchmarking Your Installation
Proper testing ensures your LLaMA 2 installation performs optimally and meets your requirements.
Basic Functionality Tests
Verify core functionality:
# Test model loading
ollama run llama2:7b "What is 2+2?"

# Test streaming response
ollama run llama2:7b "Write a short story about a robot" --stream

# Test API functionality
curl http://localhost:11434/api/tags
Performance Benchmarking
Measure inference performance:
# Time response generation
time ollama run llama2:7b "Explain machine learning in 100 words"

# Tokens per second measurement
ollama run llama2:7b "Generate a 500-word essay about renewable energy" --verbose
Memory Usage Monitoring
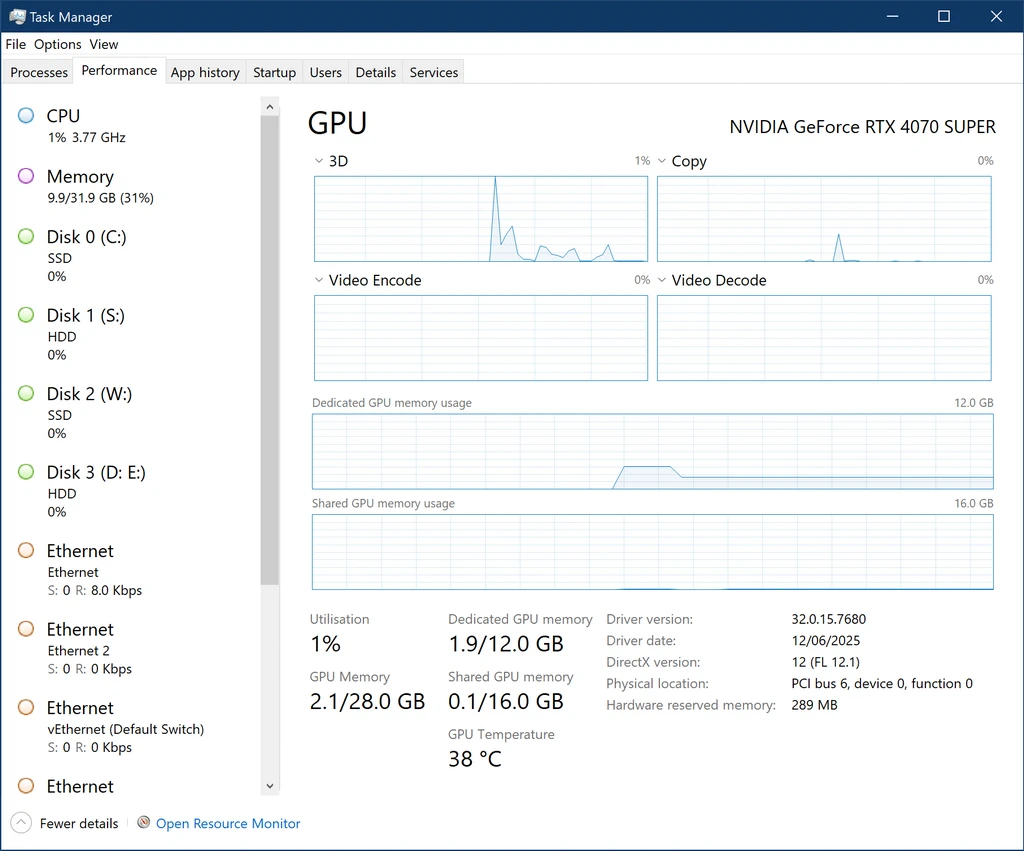
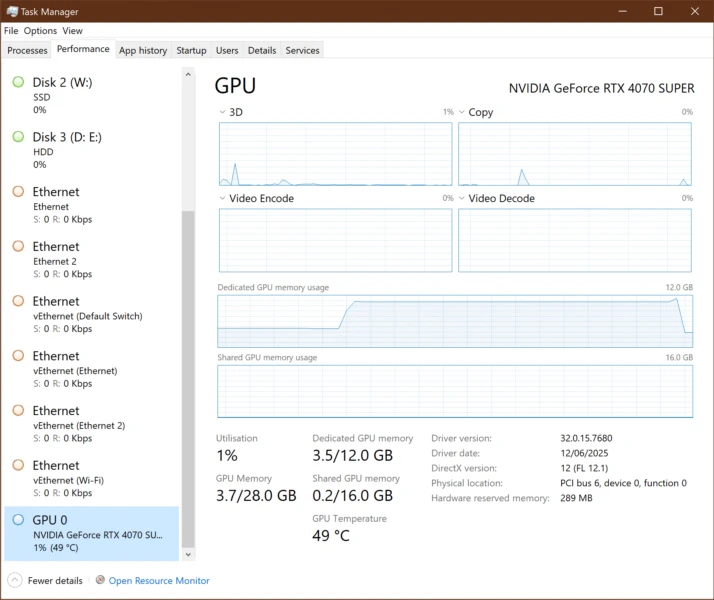
Monitor system resources during operation:
# Linux/macOS - monitor memory usage
htop

# Windows - use Task Manager or PowerShell
Get-Process ollama | Select-Object ProcessName, WorkingSet, CPU

# GPU monitoring (NVIDIA)
nvidia-smi -l 1
or
watch -n 0.5 nvidia-smi

I asked “Explain quantum computing and write 10000 words” and GPU memory was shot to 94%
Memory Management and Optimisation
Effective memory management is crucial for stable local installation, especially when running larger models or multiple instances.
Model Quantisation
Reduce memory requirements through quantisation:
# Use 4-bit quantised models (if available)
ollama pull llama2:7b-q4_0

# 8-bit quantised versions
ollama pull llama2:7b-q8_0
Memory Allocation Strategies
Optimise memory usage:
- Swap Configuration: Ensure adequate swap space (at least equal to RAM)
- Virtual Memory: Configure virtual memory settings appropriately
- Model Preloading: Keep frequently used models loaded
# Check memory usage
free -h  # Linux
vm_stat  # macOS
wmic OS get TotalVisibleMemorySize,FreePhysicalMemory  # Windows
Concurrent Model Management
Handle multiple models efficiently:
# Limit concurrent loaded models
export OLLAMA_MAX_LOADED_MODELS=1

# Automatic model unloading
export OLLAMA_KEEP_ALIVE=5m
Integration with Applications and Development
Local LLaMA 2 becomes most powerful when integrated with applications and development workflows.
Python Integration
Use Ollama with Python applications:
import requests
import json

def query_llama(prompt, model="llama2:7b"):
    response = requests.post('http://localhost:11434/api/generate',
                           json={
                               'model': model,
                               'prompt': prompt,
                               'stream': False
                           })
    return response.json()['response']

# Example usage
result = query_llama("Explain the benefits of local AI deployment")
print(result)
REST API Integration
Integrate with web applications:
// JavaScript fetch example
async function queryLlama(prompt) {
    const response = await fetch('http://localhost:11434/api/generate', {
        method: 'POST',
        headers: {
            'Content-Type': 'application/json',
        },
        body: JSON.stringify({
            model: 'llama2:7b',
            prompt: prompt,
            stream: false
        })
    });

    const data = await response.json();
    return data.response;
}
Docker Deployment
Containerise your LLaMA 2 setup:
# Dockerfile for LLaMA 2 deployment
FROM ollama/ollama

# Pull model during build
RUN ollama serve & sleep 5 && ollama pull llama2:7b

# Expose API port
EXPOSE 11434

# Start Ollama
CMD ["ollama", "serve"]
Troubleshooting Common Issues
Even with careful setup, you may encounter issues during local LLaMA installation. Here are solutions to common problems.
Installation Problems
Issue: “Command not found” after installation
# Add Ollama to PATH (Linux/macOS)
echo 'export PATH=$PATH:/usr/local/bin' >> ~/.bashrc
source ~/.bashrc

# Windows - add to system PATH via Environment Variables
Issue: Permission denied errors
# Fix permissions (Linux/macOS)
sudo chown -R $USER ~/.ollama
chmod -R 755 ~/.ollama

# Run as administrator (Windows)
Performance Issues
Issue: Extremely slow responses
- Verify adequate RAM availability
- Check if model is using GPU acceleration
- Consider using smaller model or quantised version
- Monitor CPU usage and thermal throttling
Issue: Out of memory errors
# Reduce context length
ollama run llama2:7b --context-length 2048

# Use quantised model
ollama pull llama2:7b-q4_0
Network and API Issues
Issue: API server not responding
# Check if Ollama is running
ps aux | grep ollama  # Linux/macOS
Get-Process ollama    # Windows

# Restart Ollama service
sudo systemctl restart ollama  # Linux
brew services restart ollama   # macOS
Issue: Model not loading
# Verify model download
ollama list

# Re-download corrupted model
ollama rm llama2:7b
ollama pull llama2:7b

Sample Model Management and Troubleshooting. Restart ollama service and delete model
Performance Comparison: Local vs Cloud
Understanding the trade-offs between local and cloud deployment helps inform your infrastructure decisions.
Local Deployment Advantages
Running LLaMA 2 locally offers several compelling benefits:
- Privacy: Complete data control with no external transmission
- Cost: No per-token or API usage fees after initial setup
- Latency: Reduced network overhead for faster responses
- Customisation: Full control over model parameters and behaviour
- Offline Operation: No internet dependency for inference
Cloud Deployment Benefits
Cloud solutions provide their own advantages:
- Scalability: Handle variable workloads without hardware constraints
- Maintenance: No local resource management or updates required
- Access: Use latest models without local storage requirements
- Reliability: Professional infrastructure with high availability
Performance Benchmarks
Typical performance comparisons for various scenarios:
| Metric | Local (RTX 3070) | Local (M1 Mac) | Cloud API |
|---|---|---|---|
| Initial Response | 2-3 seconds | 3-5 seconds | 1-2 seconds |
| Tokens/Second | 15-25 | 10-20 | 30-50 |
| Setup Time | 30-60 minutes | 20-40 minutes | 5 minutes |
| Privacy Level | Complete | Complete | Limited |
Conclusion
Successfully implementing local LLaMA 2 opens up tremendous opportunities for privacy-focused AI development, cost-effective deployment, and offline functionality. This comprehensive setup process, from hardware planning through troubleshooting, ensures you can harness the full potential of local language model deployment.
The key to successful LLaMA 2 local installation lies in matching your hardware capabilities with appropriate model sizes, configuring optimal performance parameters, and implementing robust integration patterns. Whether you’re building applications, conducting research, or exploring AI capabilities, local deployment provides the foundation for innovative and secure AI solutions.
For additional resources and community support, visit the official Ollama documentation and explore the LLaMA 2 research paper for deeper technical insights.