A detailed guide on installing Kali Linux on VirtualBox
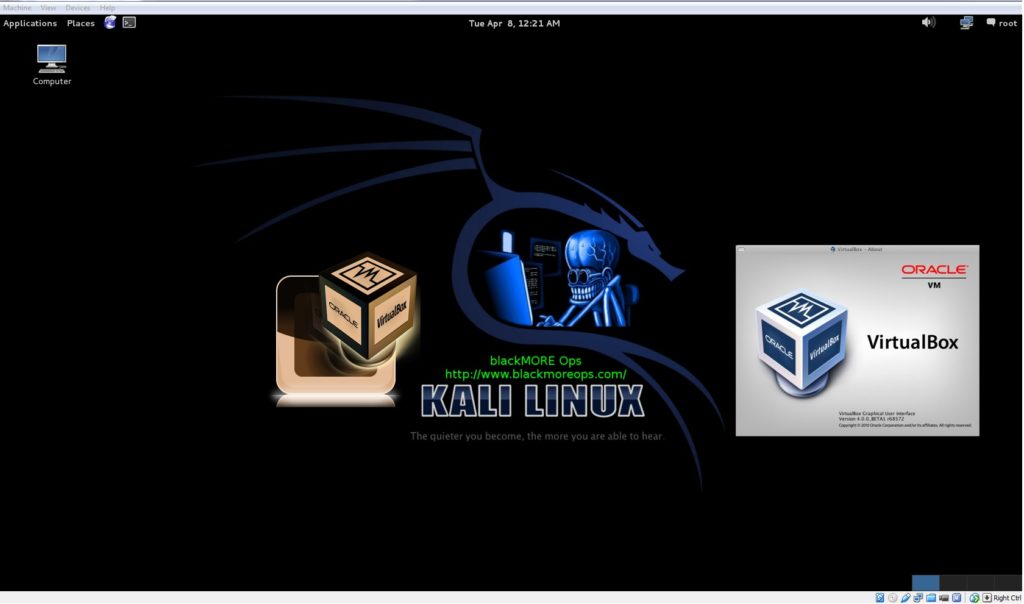
A lot of the users would like to do crazy stuffs with their Kali Linux. If you’re doing something you’re not sure, you want to install unknown packages, modify some code but don’t want to break your HOST OS, running and installing Kali Linux on VirtualBox is the best way to go. You could also try using VMware but as VMware is proprietary and VirtualBox is free to use, there’s no argument which way usual users would go. Running Kali Linux on VirtualBox is great as in that way all you need to do is take a snapshot and if you break sometime, you can quickly roll back. This imposes another problem though. If you keep breaking things and keep rolling back for everything, you don’t really learn the Operating System itself. You are learning to bypass and overlook a problem with a easy way out. I am going to judge that? Maybe not. Linux can be quite complicated sometimes specially you never used it before. You might have just heard about Kali Linux from a friend and learned how much it can achieve and wanted to give it a try without actually installing it in your hard disk alongside your primary OS (may that be Windows or Linux or MAC).
Pros of running Kali Linux on VirtualBox
-
- You can run more than one OS simultaneously.
- You can install/re-install/backup/move/restore/rollback your guest OS easily.
- You can manage allocation of resource (Memory, Hard disk). Resource Management!
- You can copy your VirualBox to a different machine. Portability!
- You can completely break your installation and roll back in few clicks.
- You’re forced to troubleshoot and thus learn.
- Great for learning and testing.
Cons of running Kali Linux on VirtualBox
- Performance drop. Usually much slower.
- GPU Acceleration doesn’t work.
- USB Wireless cards can be problematic.
- You tend to avoid learning troubleshooting and just rollback quite often.
- You won’t be comfortable installing and running in real machine if you’re too used to VM’s.
- Can’t use FULL graphics as the card is Virtualized.
- Adds an additional layer between OS and actual hardware.
Saying all that, it’s true for any Virtualized environment. If you’re learning, testing.. yes go ahead. Even best one uses VM’s to test cause it’s just too much time consuming to install and re-install and update.
Note: You may want to check the updated post as well to install Kali Linux on Virtualbox, those posts are slightly newer and recommended. I’ve listed those guides below:
What is VirtualBox
VirtualBox is a general-purpose full virtualizer for x86 hardware, targeted at server, desktop and embedded use. It is a powerful x86 and AMD64/Intel64 virtualization product for enterprise as well as home use. Not only is VirtualBox an extremely feature rich, high performance product for enterprise customers, it is also the only professional solution that is freely available as Open Source Software under the terms of the GNU General Public License (GPL) v2. Presently, VirtualBox runs on Windows, Linux, Macintosh, and Solaris hosts and supports a large number of guest operating systems including but not limited to Windows (NT 4.0, 2000, XP, Server 2003, Vista, Windows 7, Windows 8), DOS/Windows 3.x, Linux (2.4, 2.6 and 3.x), Solaris and OpenSolaris, OS/2, and OpenBSD.
VirtualBox is being actively developed with frequent releases and has an ever growing list of features, supported guest operating systems and platforms it runs on. VirtualBox is a community effort backed by a dedicated company: everyone is encouraged to contribute while Oracle ensures the product always meets professional quality criteria.
Things you need to install
As I am going to show this in Windows here’s the link to Windows installer. You can download MAC or Linux installer and follow EXACTLY the same steps to install and run VirtualBox in your machine.
- VirtualBox 4.3.10 for Windows hosts x86/amd64
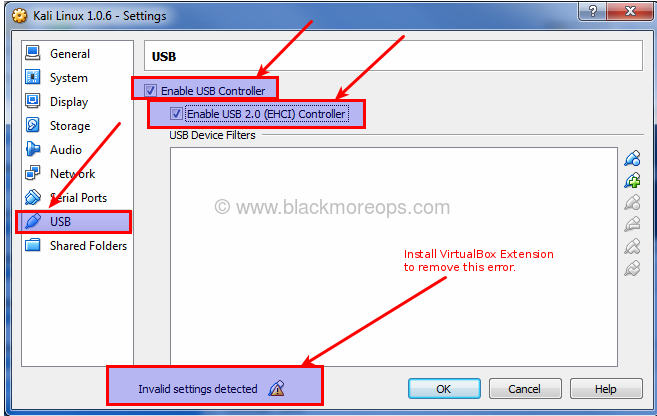
- VirtualBox 4.3.10 Oracle VM VirtualBox Extension Pack for All supported platforms
Extension pack provides the following added functionality:
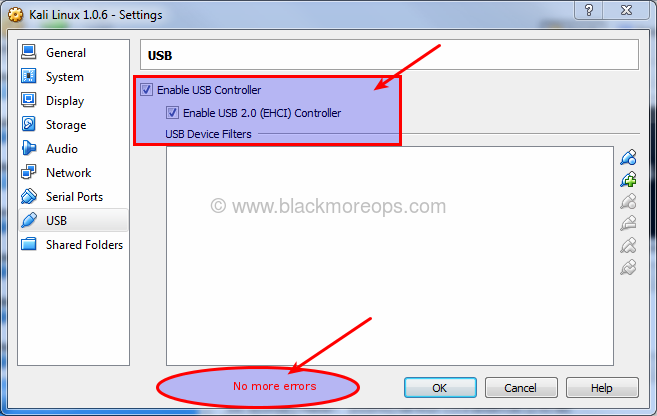
- The virtual USB 2.0 (EHCI) device;
- VirtualBox Remote Desktop Protocol (VRDP) support;
- Host webcam passthrough;
- Intel PXE boot ROM and
- Experimental support for PCI passthrough on Linux hosts.
If you need instructions on how to install VirtualBox in your machines (may that be a Windows, Linux or MAC or Abracadabra, refer to their User Manual. VirtualBox user Manual is VERY detailed and specific installation instruction can be found here.
Download page: https://www.virtualbox.org/wiki/Downloads
Kali Linux
I mean if you don’t know what Kali Linux is, you wont be here!! Right? Anyhow, Kali is the Hindu goddess associated with empowerment! I’m just kidding. Kali Linux is a Debian-derived Linux distribution designed for digital forensics and penetration testing. It is maintained and funded by Offensive Security Ltd. It was developed by Mati Aharoni and Devon Kearns of Offensive Security through the rewriting BackTrack, their previous forensics Linux distribution. Say hi to Mati and Kali Dev team at www.kali.org.
You need to download the latest version of Kali Linux ISO from here.
You can also download from CDImage Page here:
I would personally suggest downloading using TORRENT and it seems more stable and less chance of data corruption.
In this guide I will outline very detailed step by step instructions on installing Kali Linux on VirtualBox where Windows 7 is the HOST operating system.
Installing Kali Linux on VirtualBox
In this guide, I will cover the followings:
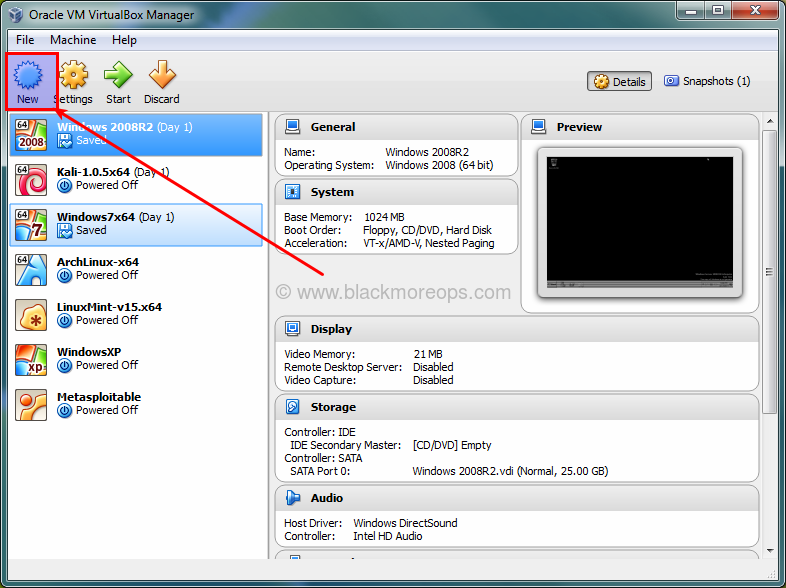
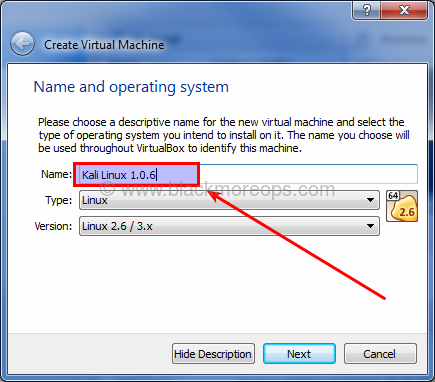
- Create a new Virtual Machine
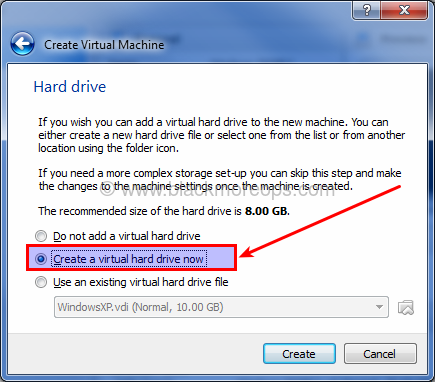
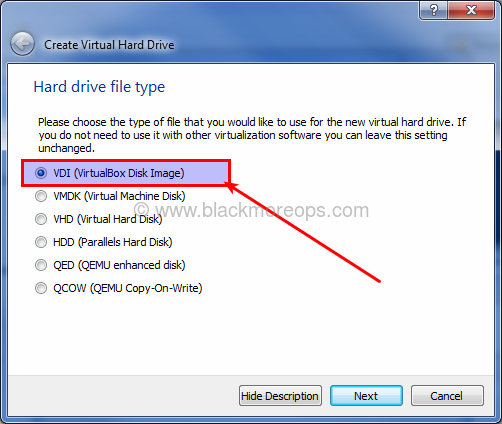
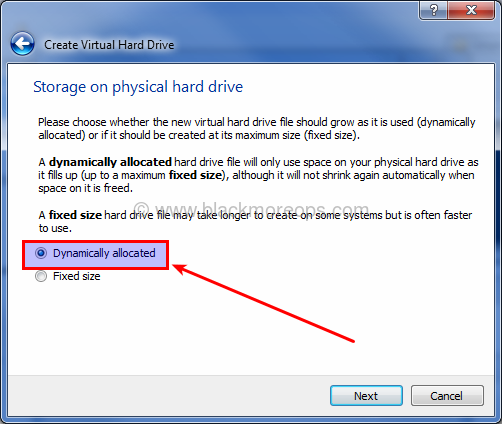
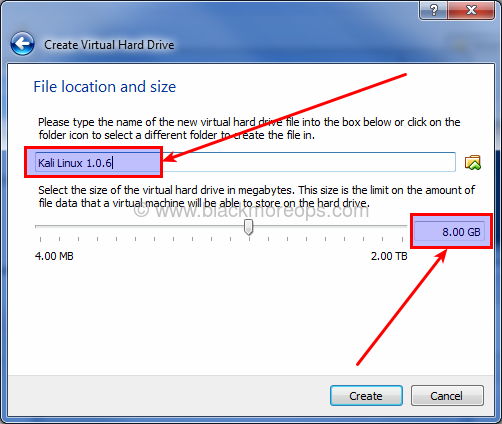
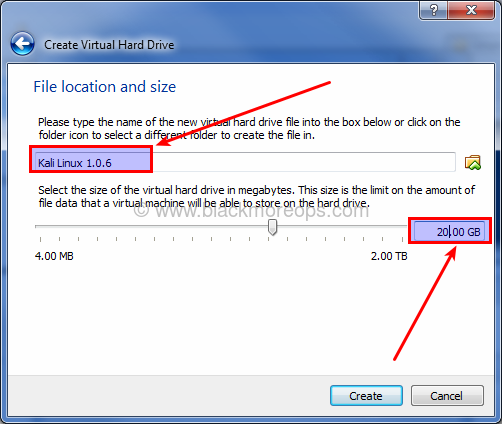
- Create a new Virtual disk (VDI, dynamic allocation etc.)
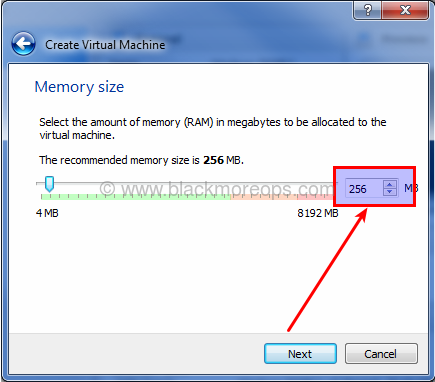
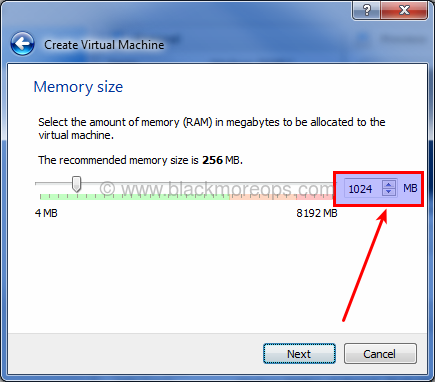
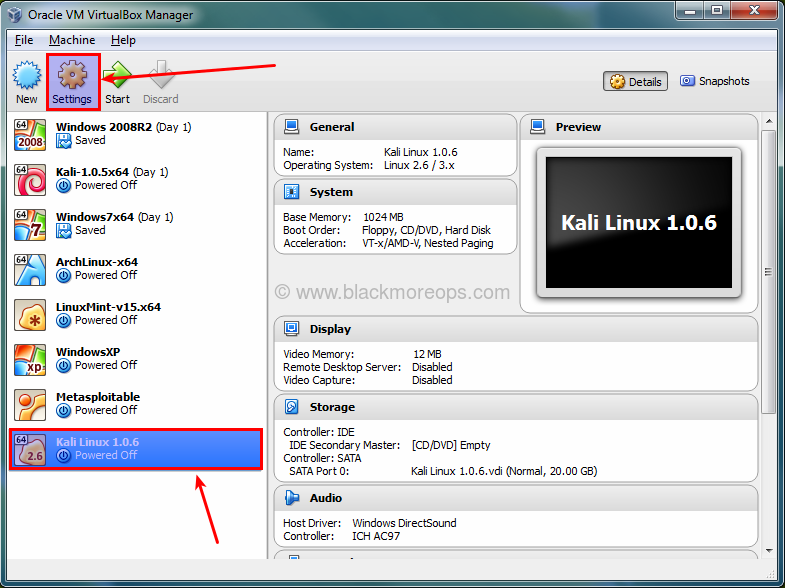
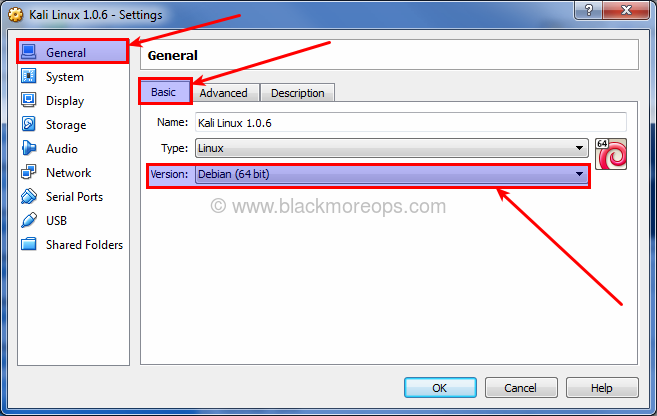
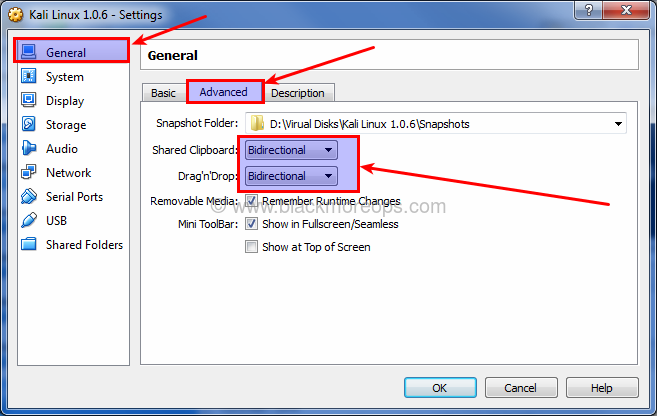
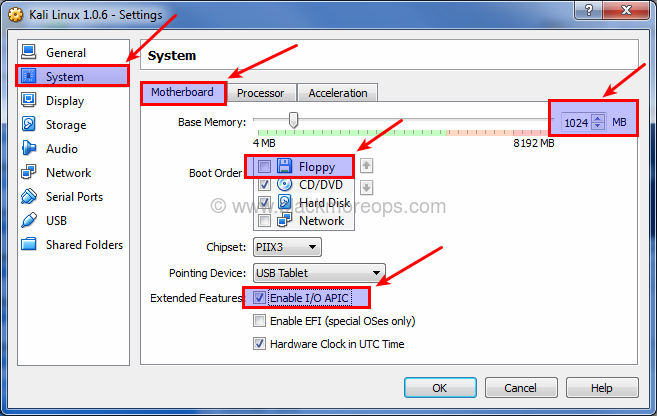
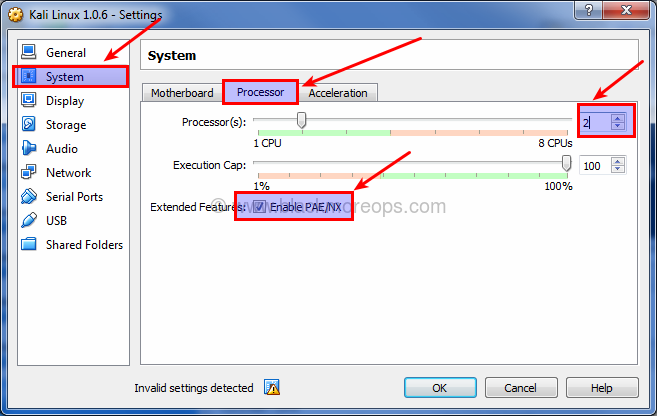
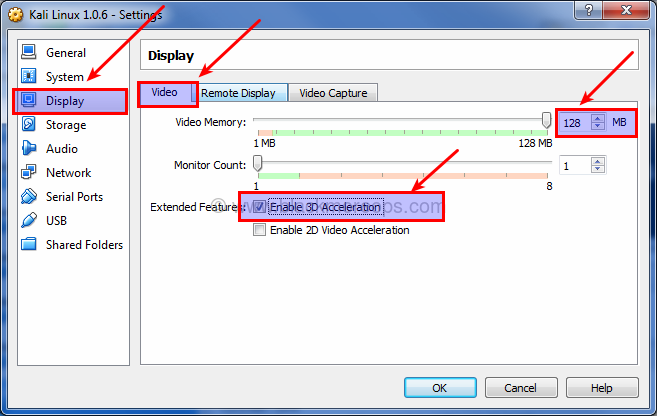
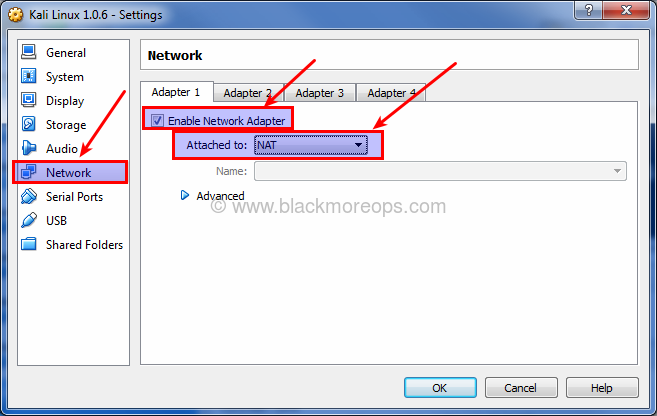
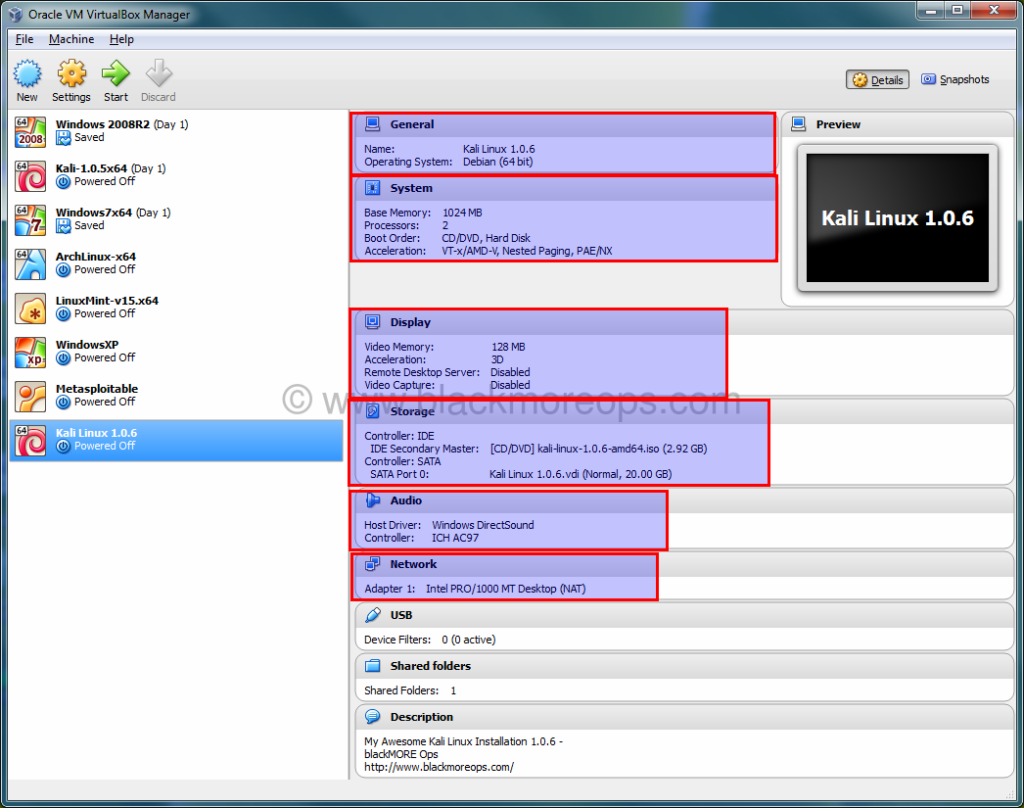
- Modifying some VirtualBox settings (allocating physical and Video memory, selecting OS Type, CPU acceleration etc.)
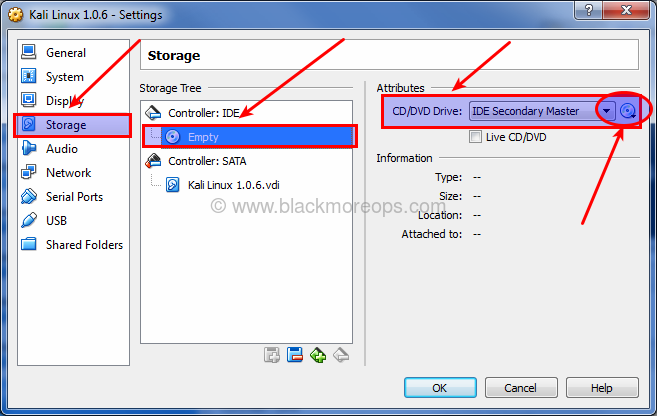
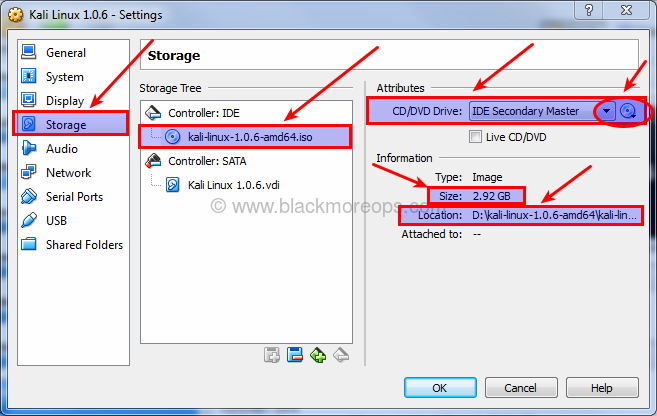
- Loading Kali ISO
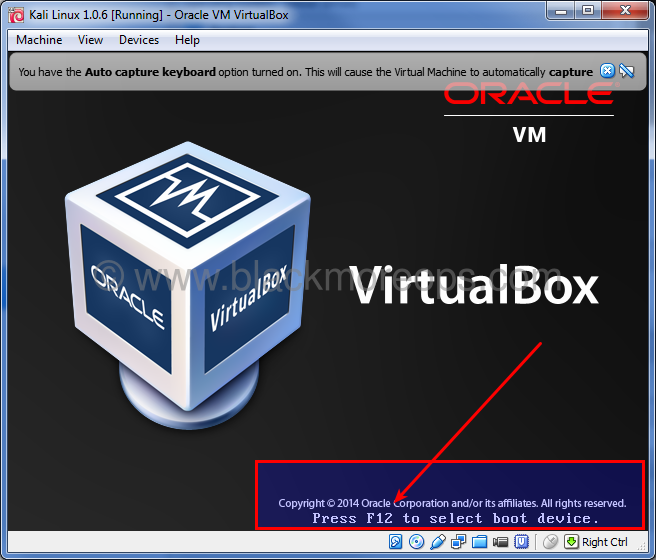
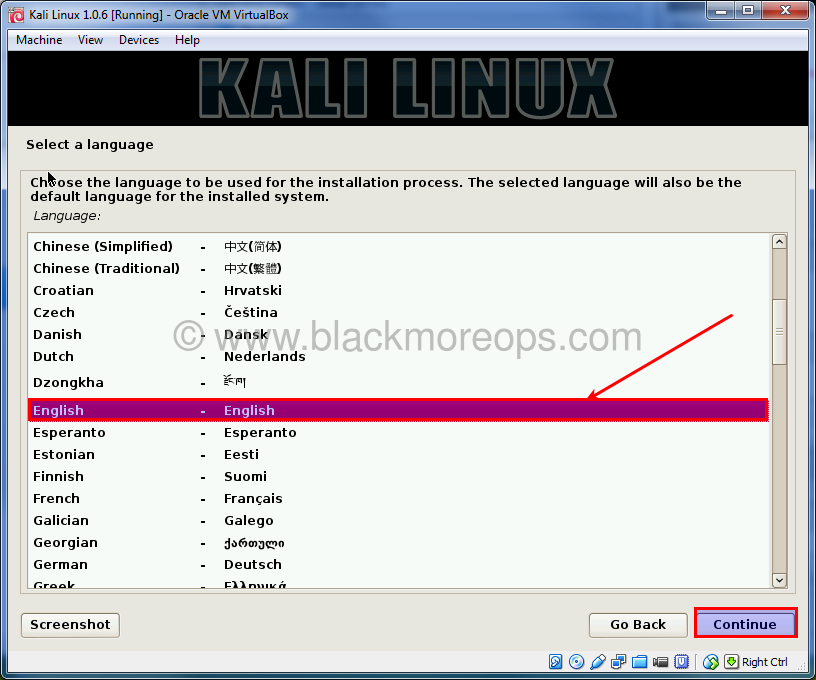
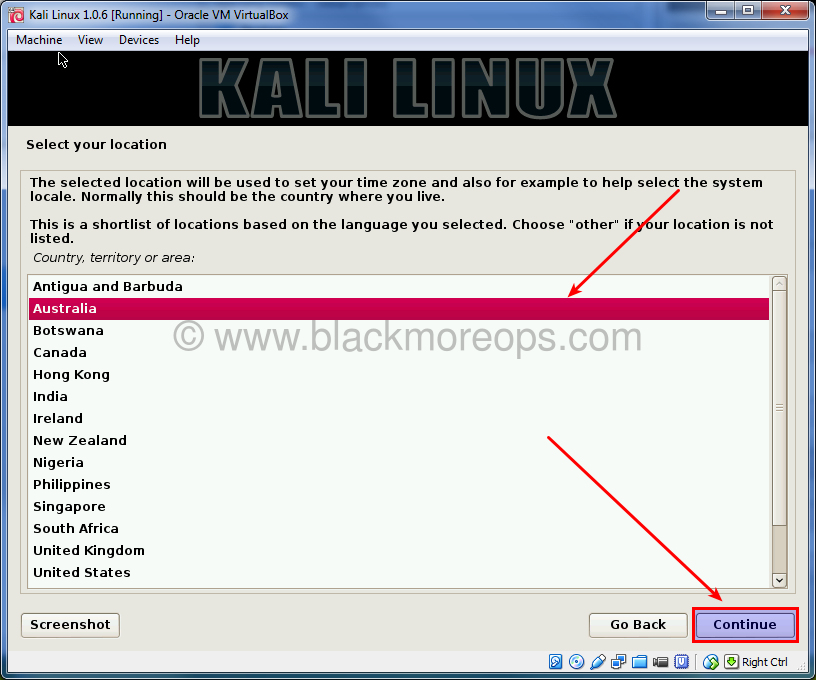
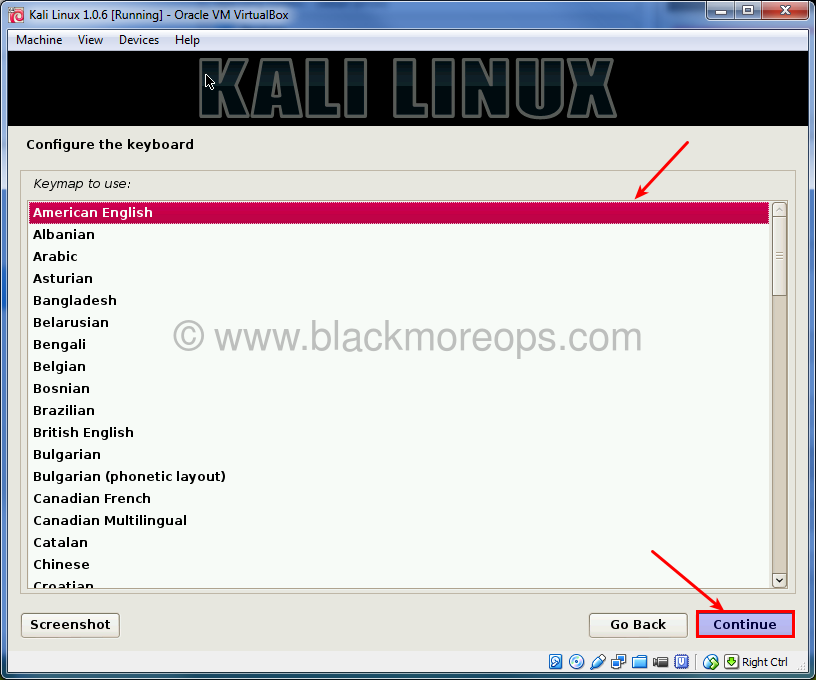
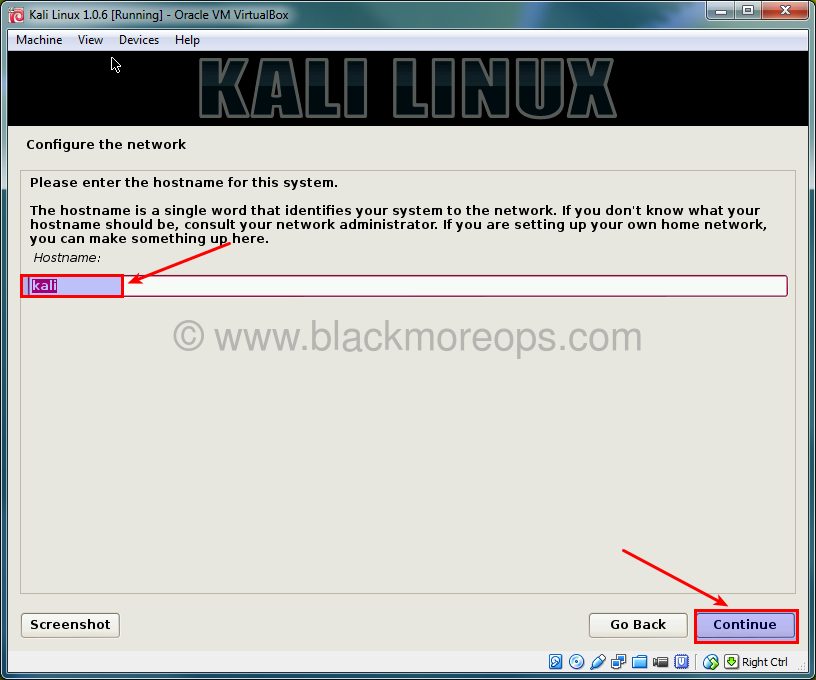
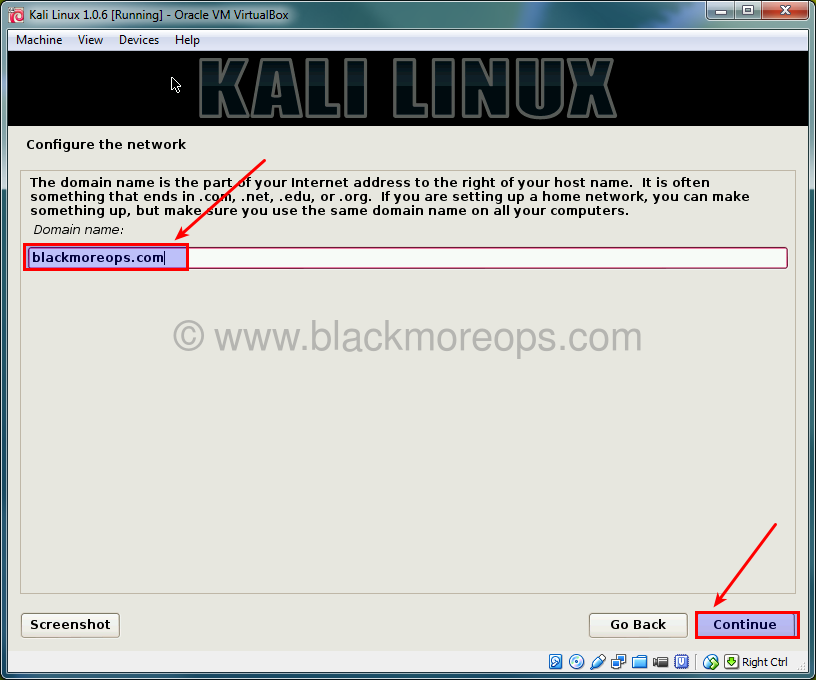
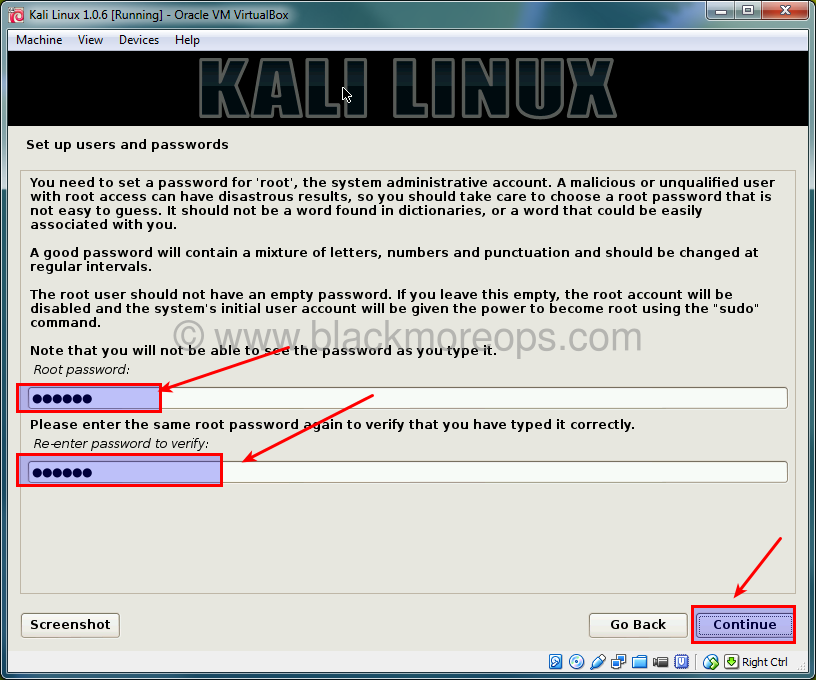
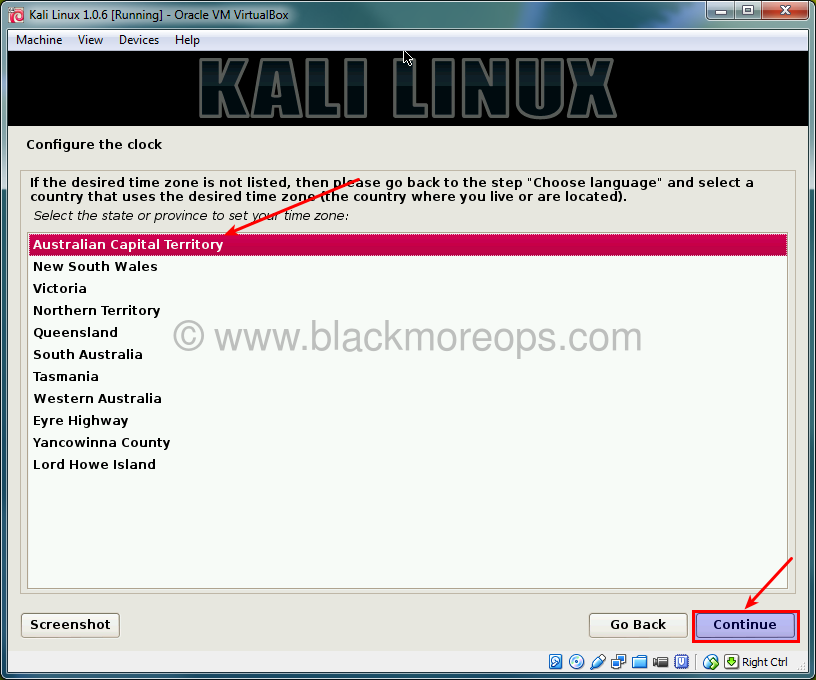
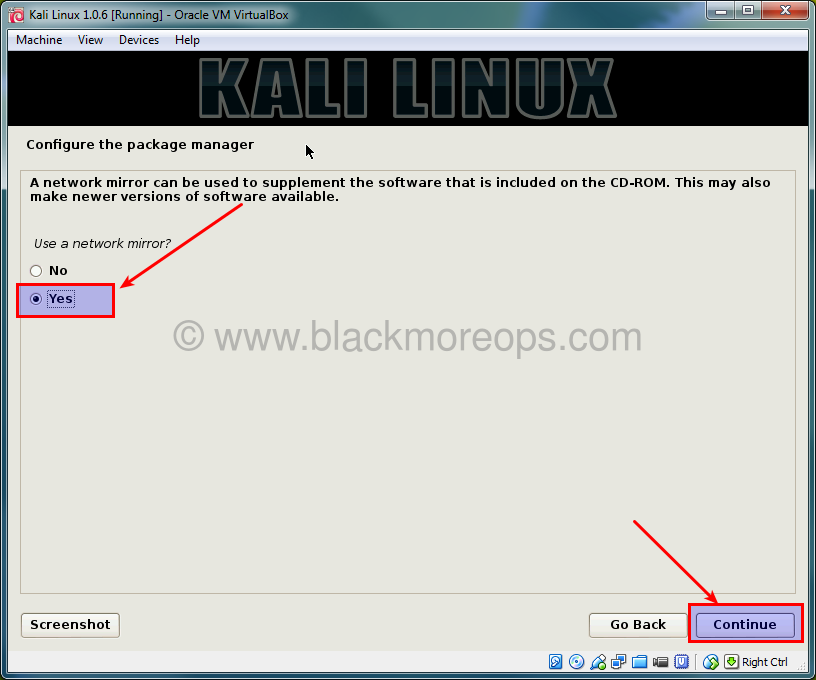
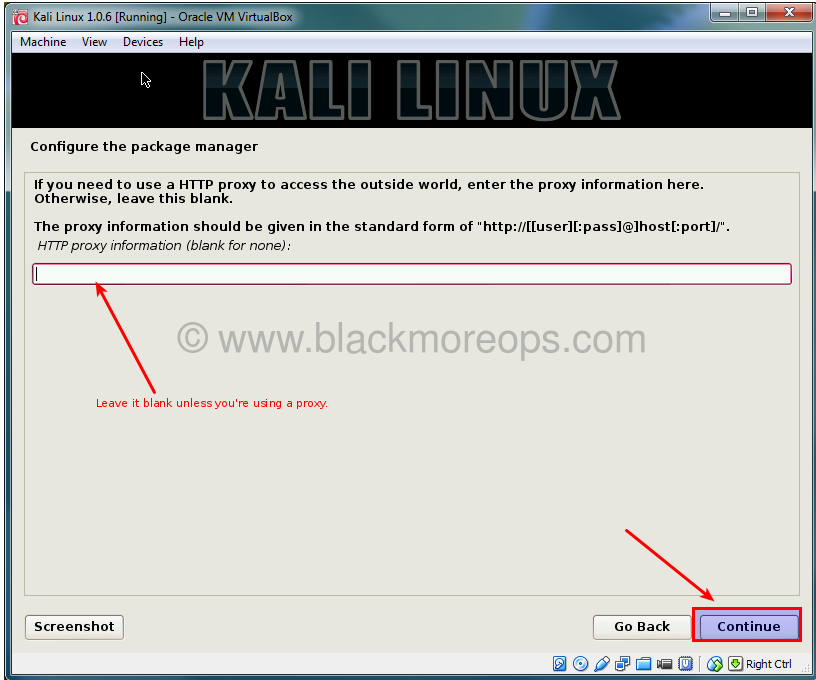
- Booting Kali ISO (initial info, location, timezone etc.)
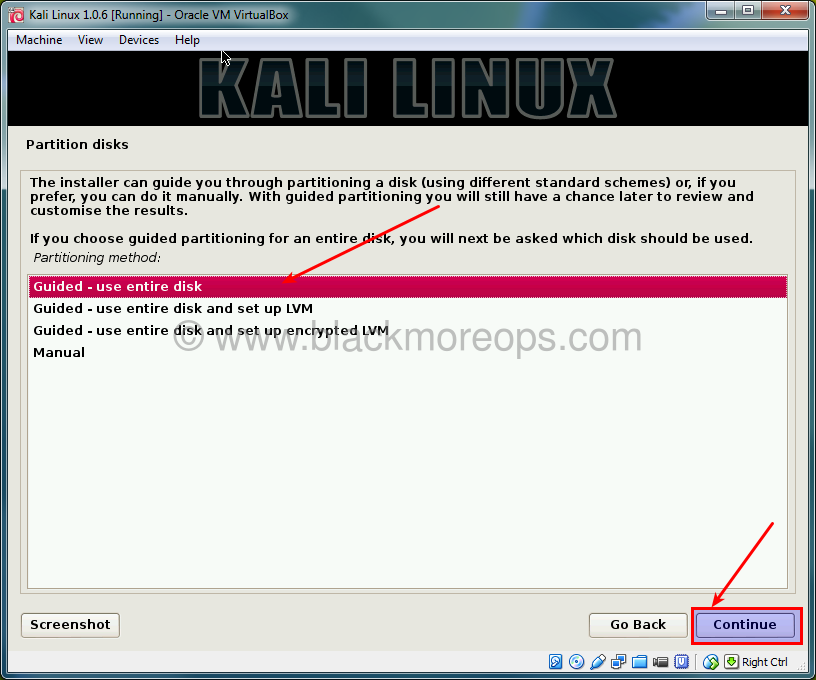
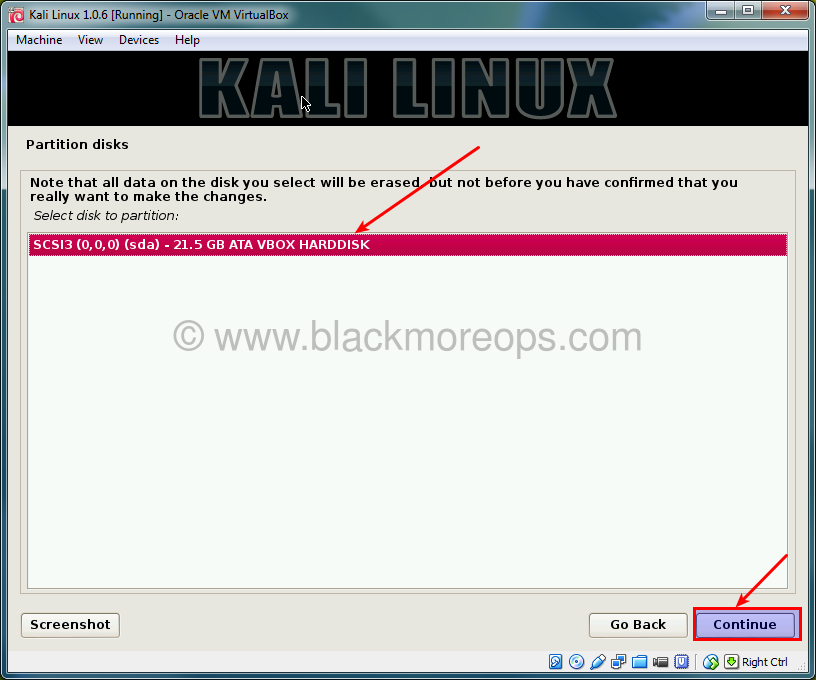
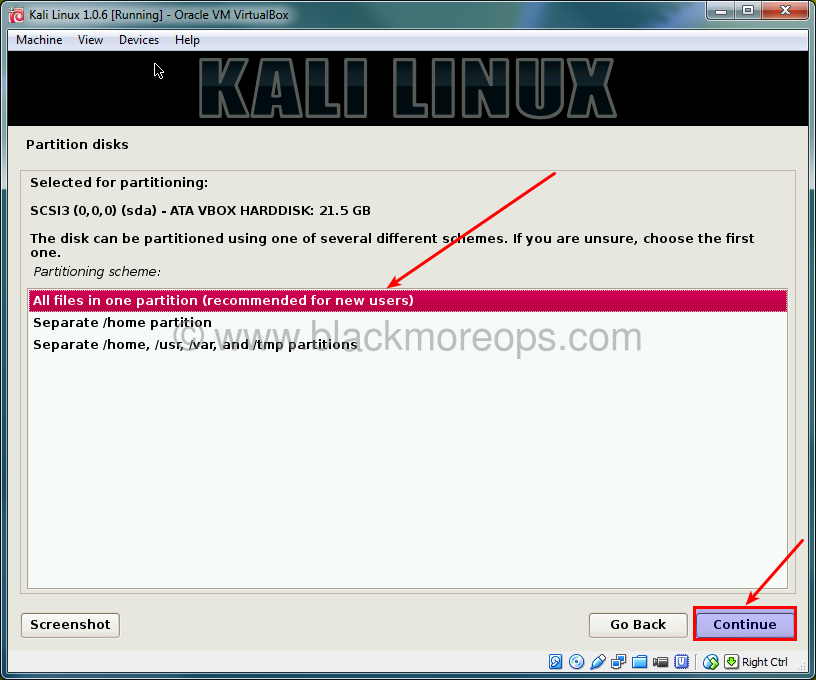
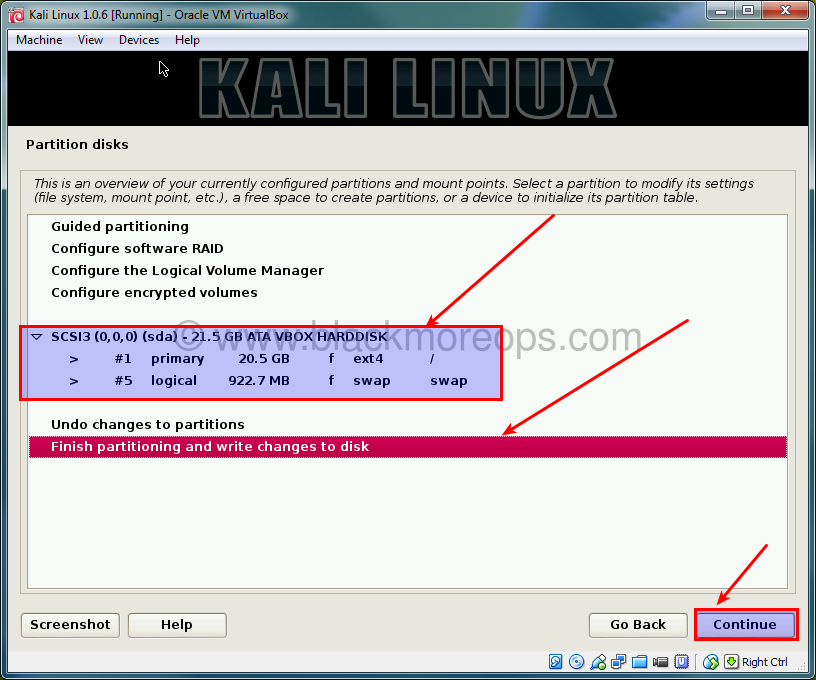
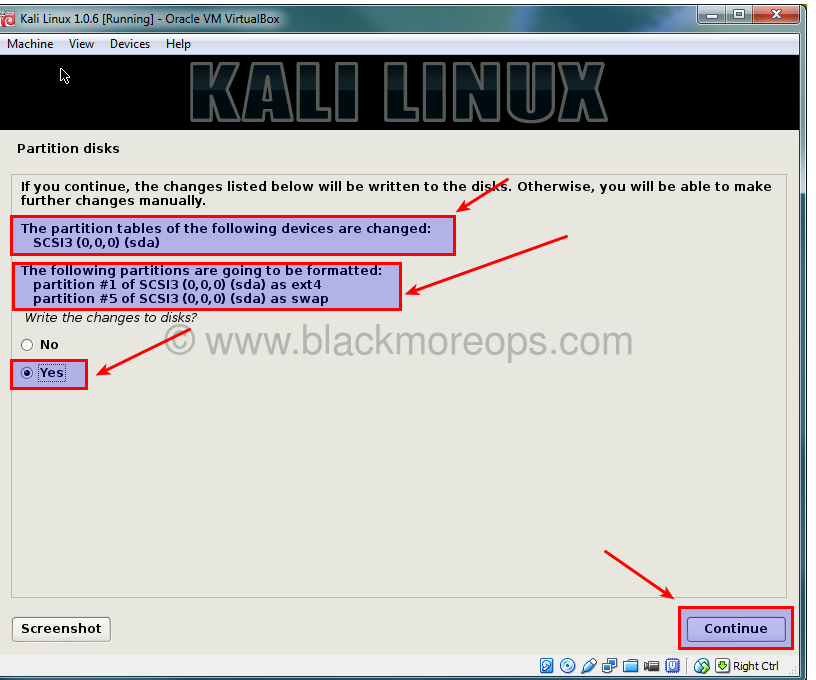
- Kali disk partitioning (you should try other ways than I’ve showed here to learn)
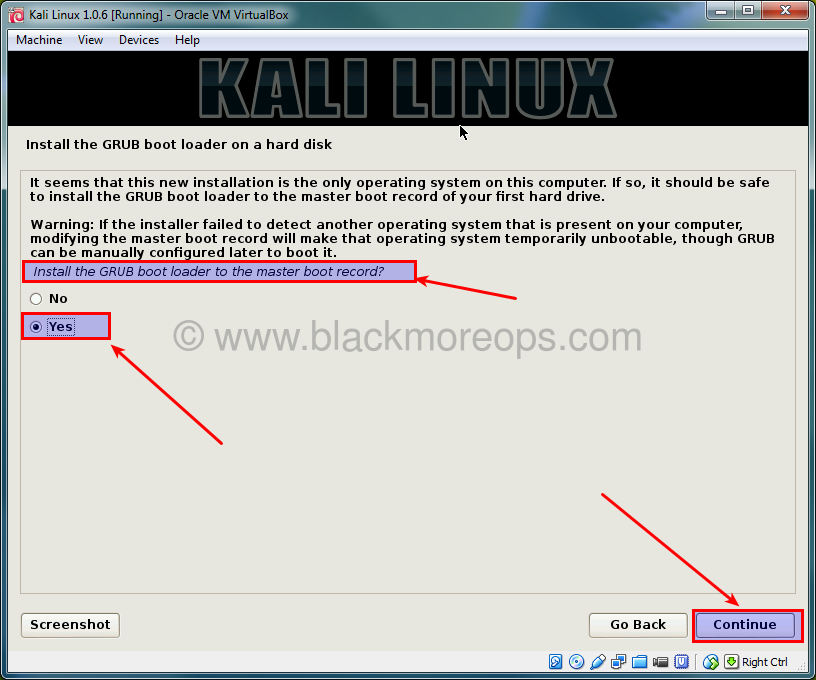
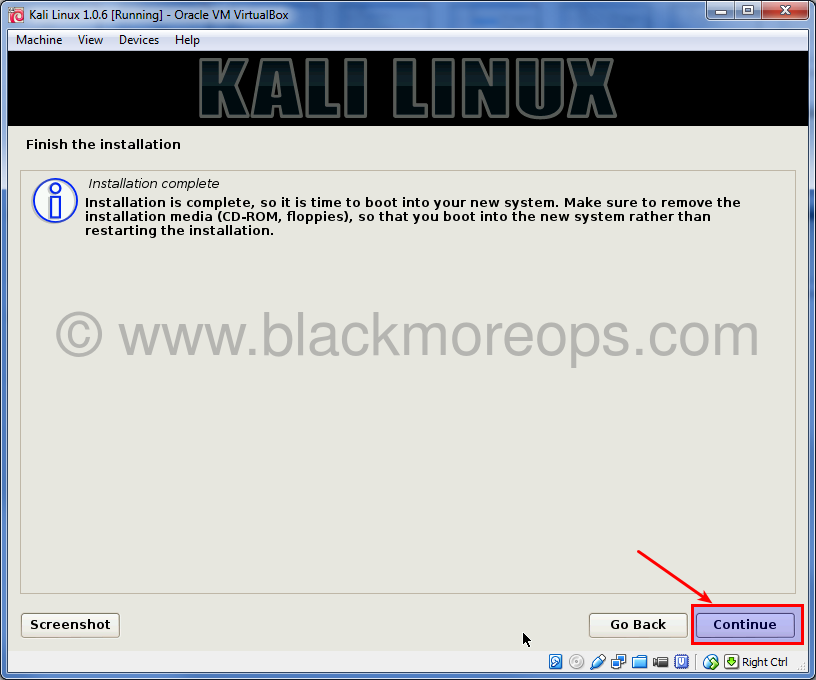
- Finalizing instllation and running Kali on VirtualBox.
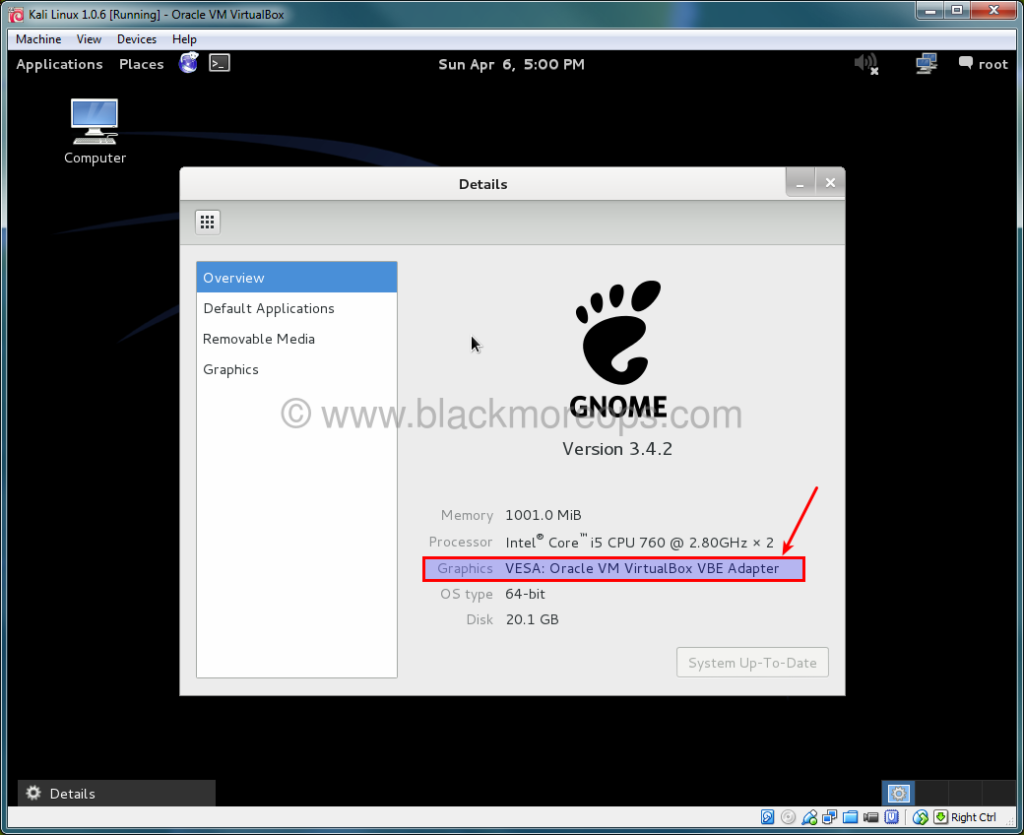
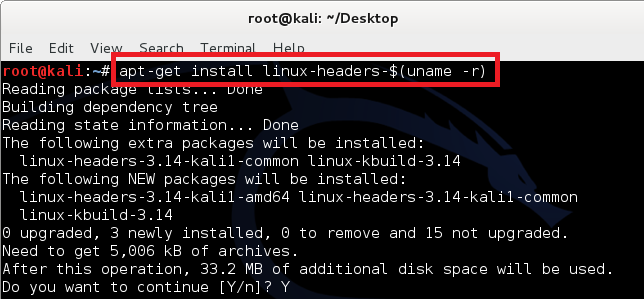
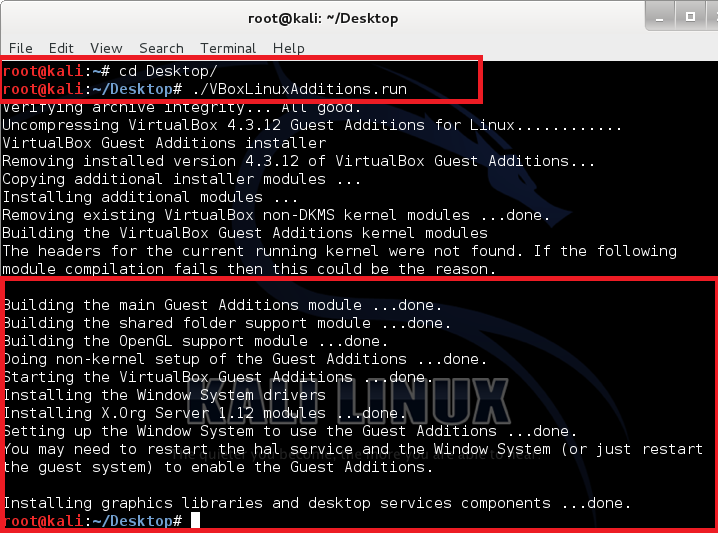
- Install Virtualbox Guest Additions packages
You have two options here to follow this guide,
- You can just use the slideshow in this page and pretty much follow that..
- You can read this really long informative guide to get a better understanding of what to do
So choice is yours. Go to next page as if you want to follow all the steps. It’s a pretty long guide, so had to break it into two pages.
Discover more from blackMORE Ops
Subscribe to get the latest posts sent to your email.

223 comments
10 star rating out of 5! Thanx dude
after entering graphical settings went wrong pls explain me
I am glad that I observed this site, exactly the right
information that I was searching for!
Why I cant download iso file.
when I try to download, it says cant reach reach this page..
how to download???
Hello I have a problem. I already installen kali linux but after the instal it switched to a blackscreen with a flikkering underscore. I tried installing it again or closing and booting it up again but I always end up on the flikkering underscore. Can someone pls help
hi man i instaled kali linux on my windows7 with virtual box
after i go in and do install graphical an error shows saying:
-end kernel panic not syncing fatal exeption in interrupt.
and it also said :
kernel offset 0x16000000 FROM 0xc1000000
Hi there, thanks for the detailed write up on how to install as my installation is now working.
Hey,
Great article, can you tell me how do i change the drive when the disk partition happens in the kali installation. It always installs on the C: drive, i want to install it on the D: drive. My virtual box is configured in the D: drive.
Massa, you are a gem…have been able to install kali. Your guide was superb. Keep it up man.
May God bless you
Hey you rock! Am able to install KALI LINUX on my VirtualBox. thanks
with these we can install software of linux?
Damn Dude !!
You’ve explained this entire process perfectly and made it easy for everyone
Keep it up !
Thank you for putting this together!
I followed every step and Its just simply not working. Just to let you know, If you try to replicate this again on a new PC, It wont work. Working on why not….
i’ll having problem with with grub bootloader can anyone tell me how to solve i was installing kali linux on virtual box
i was installing kali on on virtual box machine but in a step grub bootloader was not installed notification appear tell me how to solve this problem …i m so worried
Hi, when I ran the VM, it output this error: Fatal! No bootable medium found. System Halted.
i am getting error while installing linux headers-
E: Unable to locate package linux-headers-4.17.0-kali1-amd64
E: Couldn’t find any package by glob ‘linux-headers-4.17.0-kali1-amd64’
E: Couldn’t find any package by regex ‘linux-headers-4.17.0-kali1-amd64’
i want to install virtualbox on my linux bootable pendrive
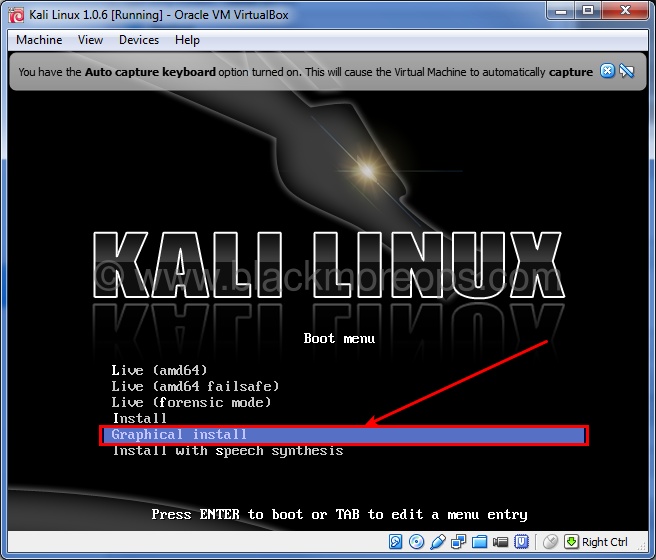
what will happen if i select install in place of graphical install