
Table of Contents
Step 6: Kali disk partitioning
As this is all Virtualized, you can choose anything you want to. I personally think you should play around in this screen to get familiar with how Disk partitioning works. Disk partitioning usually scares the hell out of new users and you are potentially at risk of loosing Data. In VirtualBox environment however, go NUTS!
For the sake of this guide, I will choose the most basic Partitioning method.
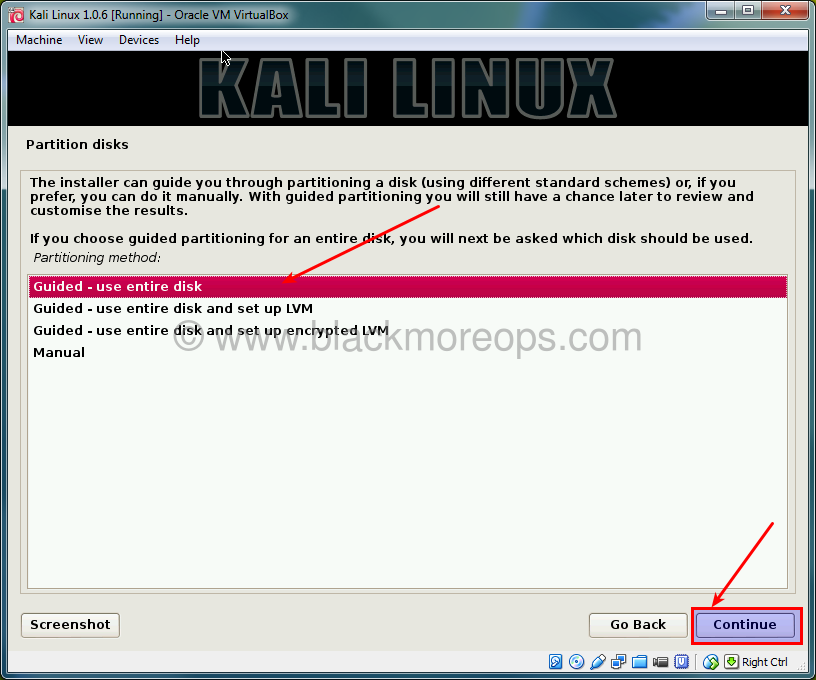
Step 6.a: Choose Partitioning method
Highlight Guided – use entire disk and Select Continue
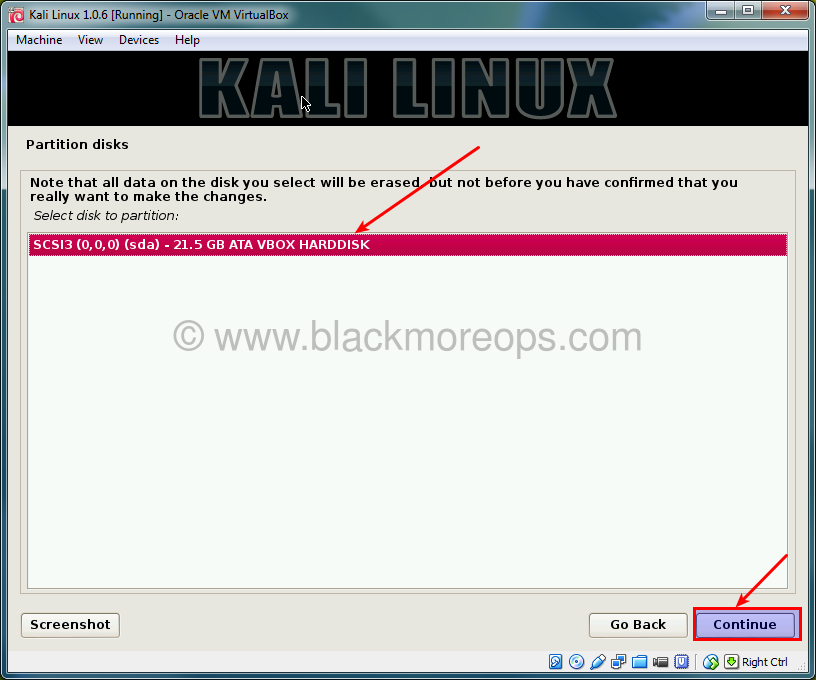
Step 6.b: Select disk to partition
You should have only 1 disk in this screen, highlight it and click Continue.
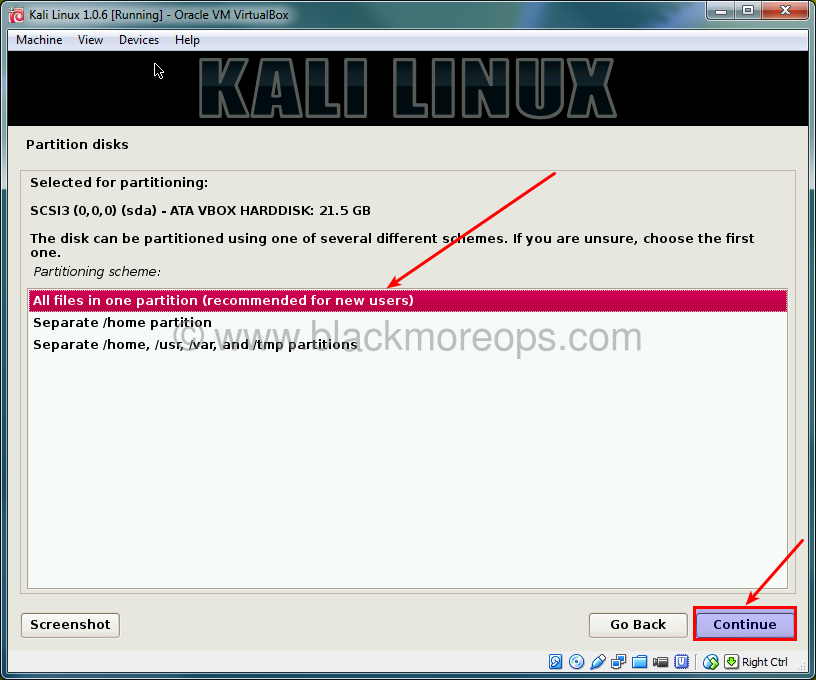
Step 6.c: Select partitioning scheme
Highlight “All files in one partition” and click Continue.
You might want to play around in this screen if you feel like. This is a good thing to learn as in corporate environment, you select disk scheme manually.
I will advise you to read Redhat’s Recommended Partitioning Scheme for a better understanding.
Step 6.d: Finish partitioning
On the next screen, Highlight Finish partitioning and white change to disk and click Continue.
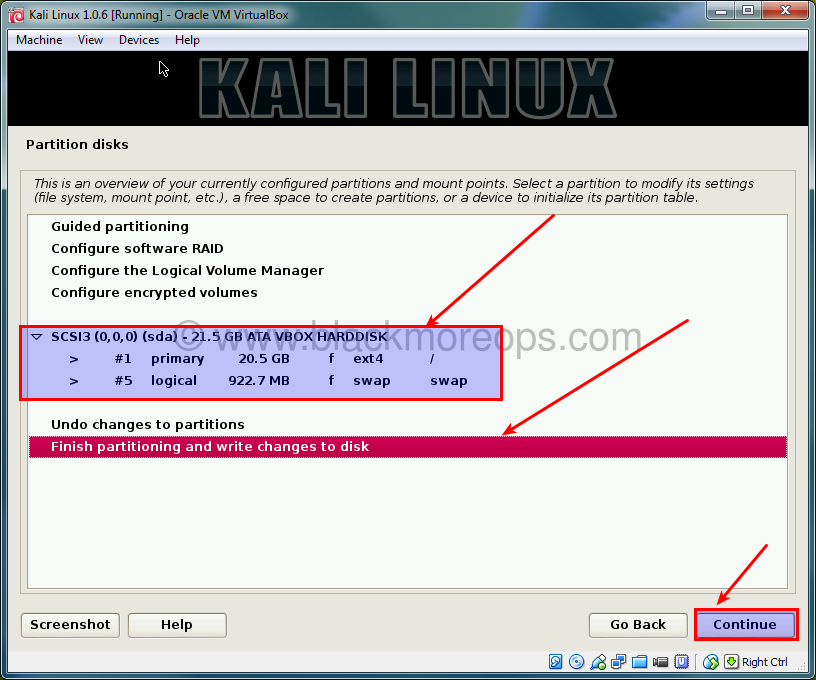
Note that how the partitioning is done. Click Continue when you’re satisfied.
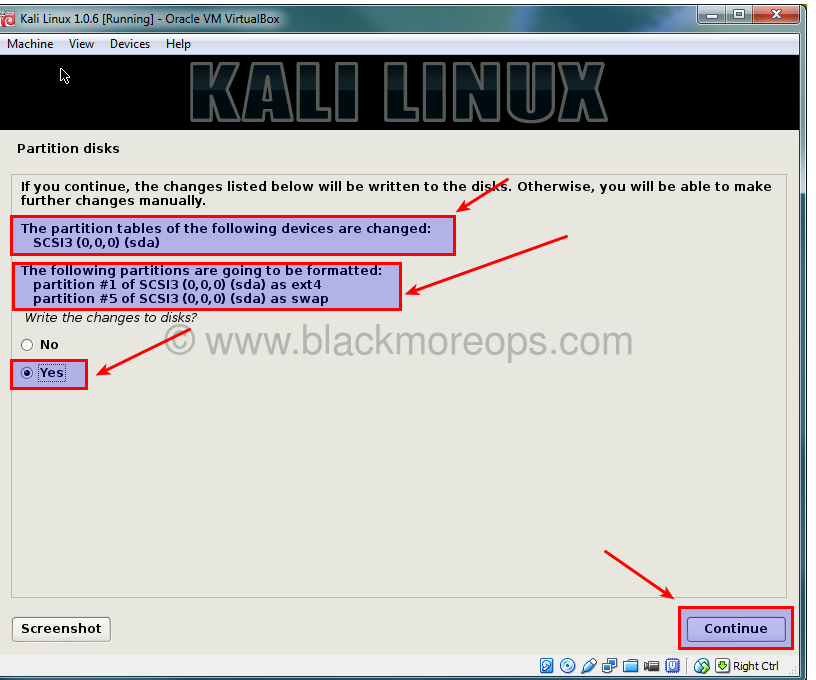
Finally, on the next screen, highlight “Yes” and click Continue to write changes to disks.
Your installation will start now. On my PC which got a 5400 RPM Hard disk, it takes about 8 mins.
223 comments
Greatest and full working tutorial installed kali successfully which i wasn’t vable to install from moths you helped like a fairy thanks!.
i am still facing same issue during installing kali linux with virtual box. I followed all step of this manual.
http://download.virtualbox.org/virtualbox/4.3.10/Oracle_VM_VirtualBox_Extension_Pack-4.3.10-93012a.vbox-extpack
The link for the extension pack needs updated. Above should be the correct one, testing now to make sure.