
Table of Contents
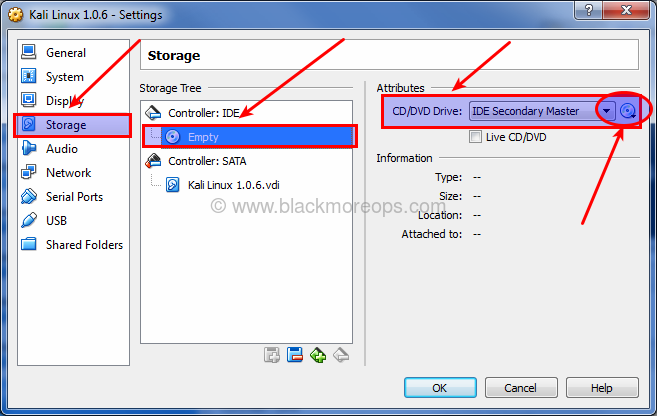
Step 4: Loading Kali ISO
Select Storage > Controller: IDE and highlight Empty CD ICON. Now on your right, you should be able to use the little CD ICON (it should be CD/DVD Drive: IDE Secondary Master already, if not change it) and select your downloaded ISO.
Once you select your downloaded ISO (in my case, it’s kali-linux-1.0.6-amd64.iso). See the properties and information’s changes accordingly.
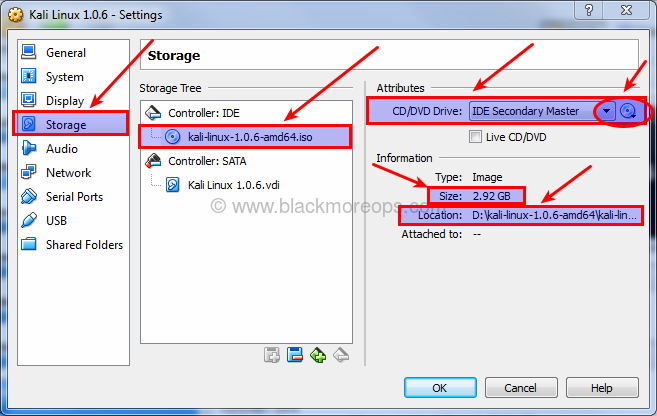
Important thing to note: Size… if your disk size mismatched, you might have a corrupt disk. Refer to Kali download page and CDimage page for size related info. You can also do a SHA1 check to ensure your disk is not corrupted. More info here.
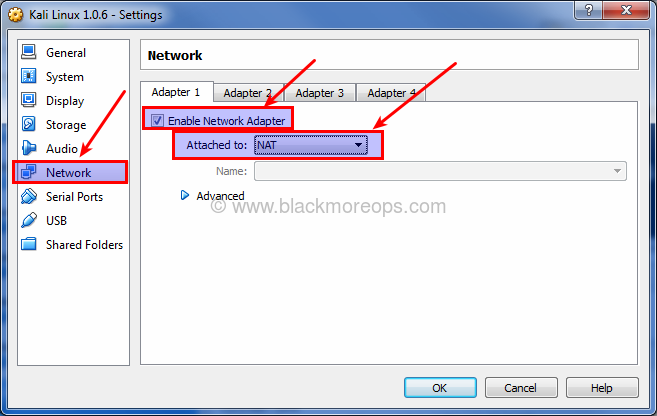
Step 4.a: Select Network connection type
If your computer is connection to internet, select NAT on Network > Adapter 1. You can enable more network adapters if you feel like to play around.
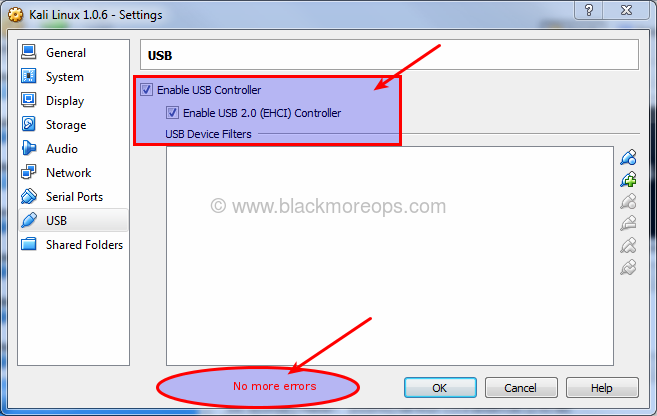
Step 4.b: Enable USB 2.0 Controllers
From USB TAB, check the boxes for Enable USB Controller > Enable USB 2.0 (EHCI) Controller. Note that I got “Invalid settings detected” error at the bottom of the screen. Install VirtualBox Extension Pack to remove this error.

You need to PRESS OK and save your Settings first.
Close VirtualBox and then install VirtualBox 4.3.10 Oracle VM VirtualBox Extension Pack for All supported platforms.
It will enable virtual USB 2.0 (EHCI) device support, VirtualBox Remote Desktop Protocol (VRDP) support, Host webcam passthrough support.
Re-Open VirtualBox and Select Settings > USB again to confirm you don’t have that error anymore. Save your settings by pressing OK.
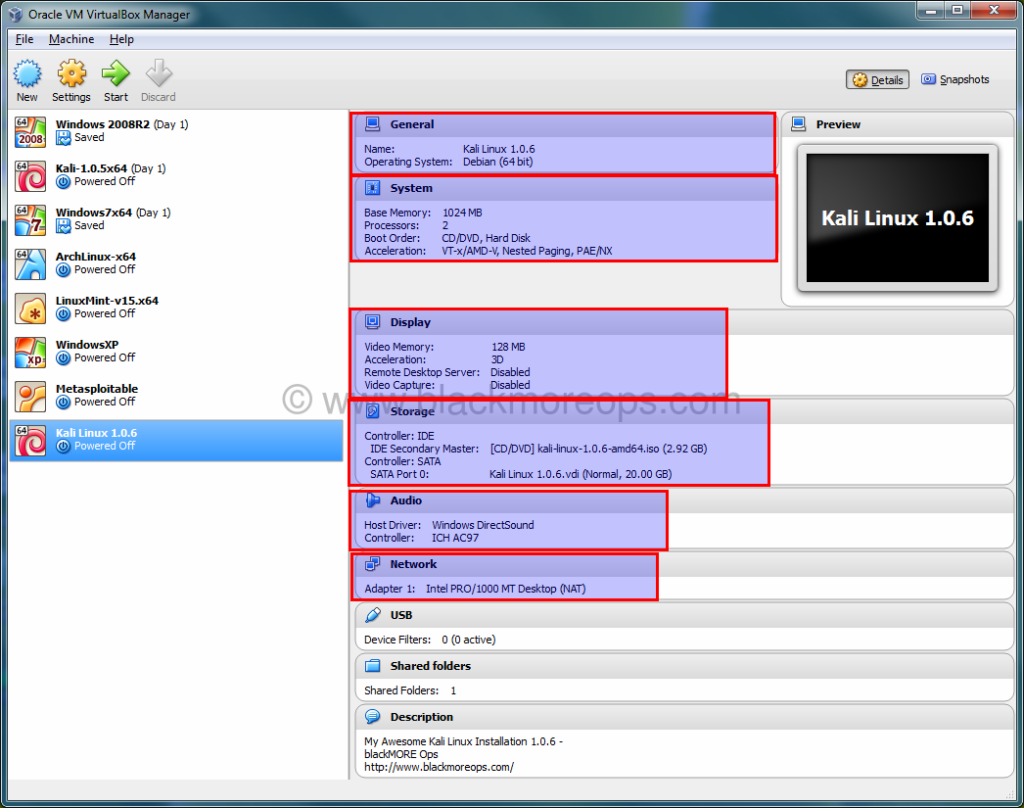
Step 4.c: Compare settings with mine
At this point your screen should be somewhat similar to mine. I’ve highlighted the imporatnt parts, if something didn’t match you can go back and enable disable those settings. Note that, for 32-bit users, it will be slightly different.
223 comments
Greatest and full working tutorial installed kali successfully which i wasn’t vable to install from moths you helped like a fairy thanks!.
i am still facing same issue during installing kali linux with virtual box. I followed all step of this manual.
http://download.virtualbox.org/virtualbox/4.3.10/Oracle_VM_VirtualBox_Extension_Pack-4.3.10-93012a.vbox-extpack
The link for the extension pack needs updated. Above should be the correct one, testing now to make sure.