
Table of Contents
Step 3: Modify VirtualBox settings
So far, we’ve done the followings, checklist for you:
- Created a New Virtual Machine
- Created Virtual Hard disk
- Fiddled with disk properties, type and size.
At this point you should be in the following screen. Note that I am using Kali 1.0.6 x64 bit, incase you’re using 32-bit you can change those options in here.
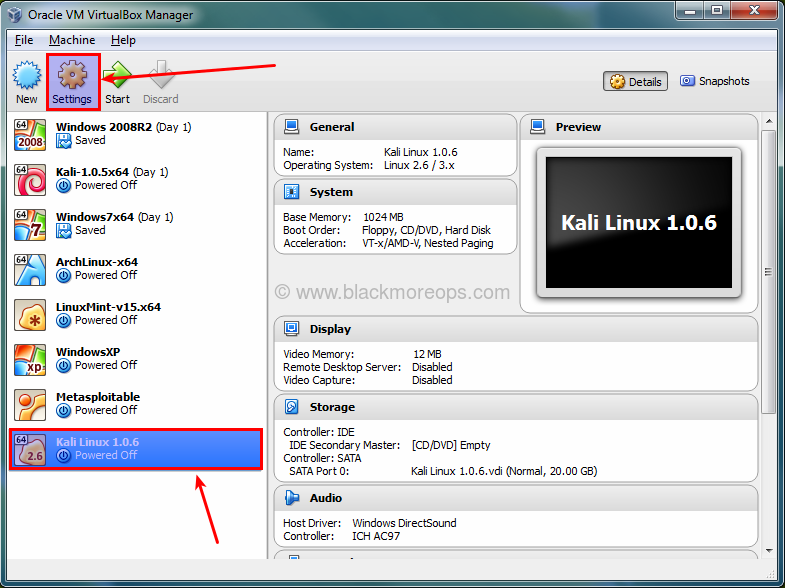
Select Kali Linux 1.0.6 (I got many), you might have just one and click on Settings icon
Step 3.a: Select type of OS
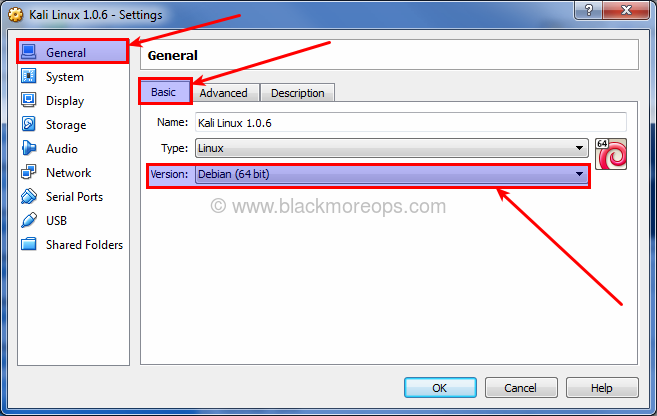
Depending on which ISO you downloaded you should select the correct Version here.
As Kali Linux is derived from Debian, I’ve selected Debian (64-bit) on General > Basic > Version. If you’re using a 32-bit ISO, select Debian (32-bit) as your version.
Step 3.b: Enable shared clipboard and dragn’drop feature
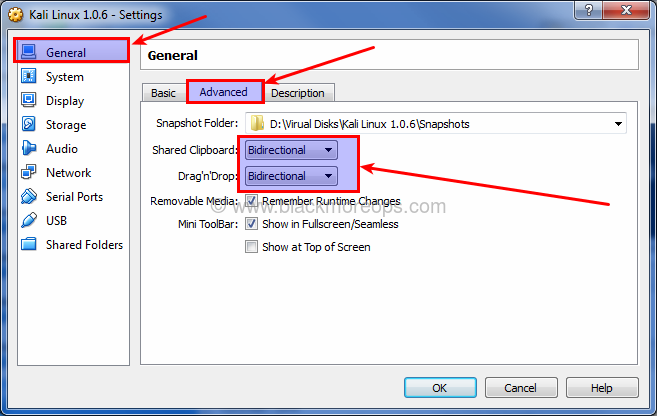
Select General > Advanced TAB and change Shared Clipboard and Dragn’Drop to Bidirectional. This will allow you to copy paste files from your HOST machine on the fly.
Step 3.c: Update Virtual Motherboard options
Select System > Motherboard, un-check Floppy (Do you even have a floppy disk drive anymore?) and Check the box for “Enable I/O APIC”. Note that you can change base memory allocation in the same screen. We’ve set it to 1024MB previously. My PC got 8.00GB RAM, which means I can actually allocate a lot more to make Kali response faster on my Virtual Machine. If you feel your Virtualized Kali Linux is slow, you should increase this Base Memory allocation.
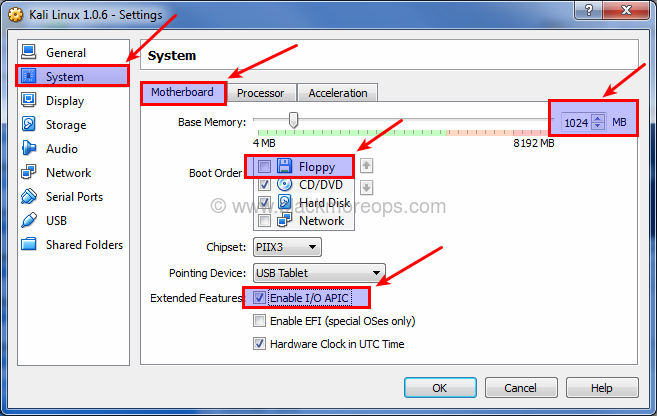
The calculations are as follows:
1.00 GB = 1024MB
2.00 GB = 2048MB
3.00 GB = 3072MB
You get the idea, just multiply 1024 with the amount of Memory / RaM you want and put the value in here.
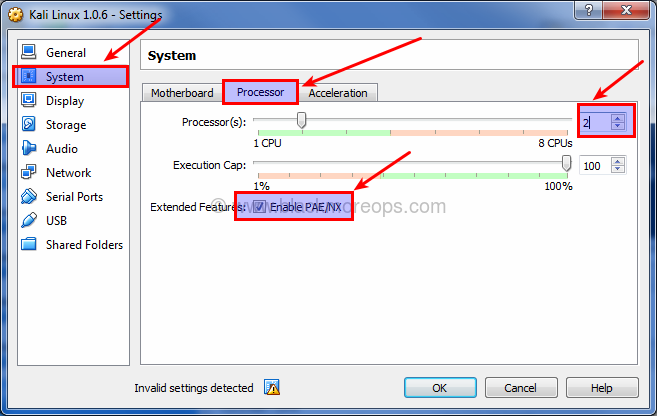
Step 3.d: Select number of Processors and enable PAE/NX
I’ve changed Processor to 2 (I got 8 CPU’s in my machine, this screen will show how many you got). Try sticking with EVEN numbers here.
Check the box for “Enable PAE/NX”.
Step 3.e: Allocate Video memory and 3D acceleration
Select Display > Video and set Video Memory to 128MB. This allows you have a good responsive desktop environment.
Also check the box for “Enable 3D Acceleration”.
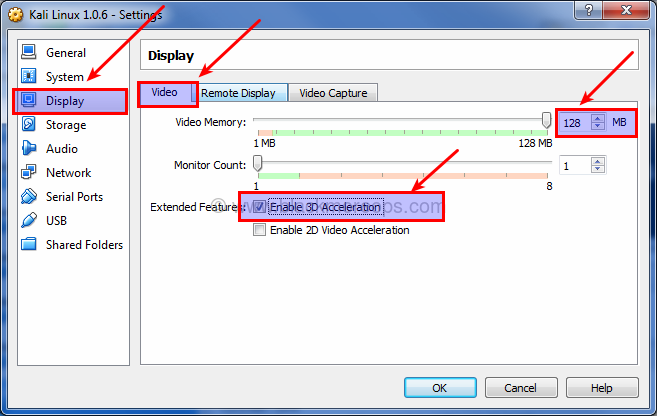
If you got more than 1 Monitor, you can change your settings here too.
223 comments
Greatest and full working tutorial installed kali successfully which i wasn’t vable to install from moths you helped like a fairy thanks!.
i am still facing same issue during installing kali linux with virtual box. I followed all step of this manual.
http://download.virtualbox.org/virtualbox/4.3.10/Oracle_VM_VirtualBox_Extension_Pack-4.3.10-93012a.vbox-extpack
The link for the extension pack needs updated. Above should be the correct one, testing now to make sure.